Speech Note transcription
$ sudo apt install flatpak$ flatpak remote-add --if-not-exists flathub https://flathub.org/repo/flathub.flatpakrepoNow reboot Raspberry Pi, then open a terminal and type:
$ flatpak install speechnoteSay “yes” to confirm that you wish to use the suggested ref, that you wish to install it, and that you wish to proceed with the suggested changes to your system installation.
Open SpeechNote from the Sound & Video menu, then go to the Languages menu, search for English (and any other language you may require) and select the models you wish to use.
OpenAI’s Whisper is open-source, and transcription tools don’t carry the intellectual property violating baggage of text or image generators, so English Whisper Small should do the trick for Speech To Text.
A number of Text To Speech models are available. We find Piper Alba Medium to be both easy on the ears and conveniently near the top of the list.
A few translation options are also available, but this list is limited to only one per language pair. You can try them out based on your translation requirements - we installed English to French and French to English - the latter was only available when we selected French in the first step of the Language installation workflow. Some punctuation checkers are also available, which can be helpful for language learners.
Download the test file, which is four seconds of speech.
In Speech Note, click File > Transcribe a file, and open the file we just downloaded. Transcription will begin automatically, and the transcribed text will be output in Speech Note’s main text pane.
Integrate Piper with Orca
Piper speech synthesis is a clear upgrade from the eSpeak synthesised voices we’re all familiar with. It’s not yet available as a default option for many screen readers, but we can integrate it with Orca, the most mature Linux screen reader.
Using Orca with Piper has its limitations, such as comparatively slow reading performance when working in a command terminal and requiring more system resources, but the more natural voice can make it more pleasant to work with if you’re primarily interacting with a GUI via keyboard shortcuts.
$ sudo apt install orca$ cd Software$ git clone https://codeberg.org/MightyOwlbear/rpi-piper-tools.git$ sh install-spd-piper.shEnter your password to install dependencies when prompted.
Once installed - assuming the test audio was produced, it’s time to configure the Orca screen reader to use Piper:
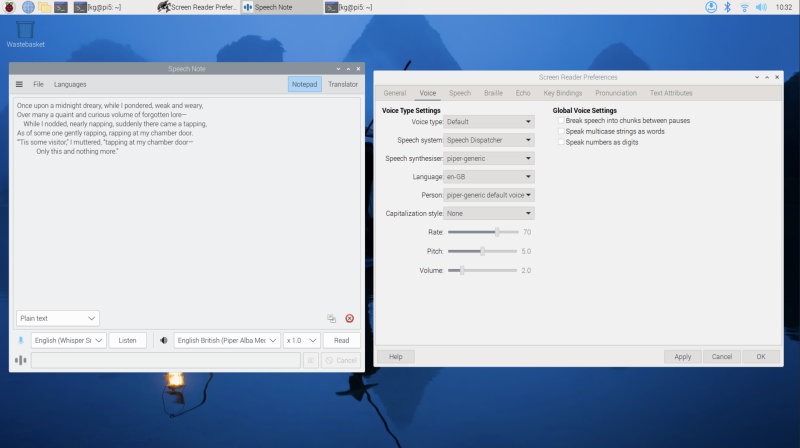
$ orca -sIn Orca’s settings tool, select the Voice tab. Under Speech synthesiser, select ‘piper-generic default voice’ from the pull-down menu.
Untick the ‘Break speech into chunks between pauses’ box on the right, then click Apply. You may also wish to change the Rate at which it speaks - we like putting this at 70.
You’ll now be hearing a Piper voice named Alan narrating your interactions. It’s worth noting that, if you’re a quick typist, Piper will not be able to keep up with your letter-by-letter text entry in the same way as eSpeak.
Orca works with both Xorg and Wayland, but we’ve seen slightly better performance in X. If you’re booting to command line and starting the GUI from there, simply invoke
$ startxinstead of
$ wayfairIf you’re booting to the GUI, you’ll have to change your config to reflect your preference. In a terminal type:
$ sudo raspi-configGo to 6 Advanced Options > A6 Wayland > X1 X11 and select OK. Reboot to enact your settings changes.


