
Persuading a child to read can be easy, but when they’ve had a bad early experience, it can be difficult to get them started again. Adding motivation to get them reading once more can kick-start the learning process if it has stalled. This is where the Story Train can be helpful: it provides a fun distraction and incentive to get to the next page. The Story Train can present a written page, or it can simply read a page out loud; what gets you from one page to the other is taking the Story Train around the track. But it’s not only using the Story Train that can be helpful – older children can write stories for the Story Train to tell, and that in itself is another motivation for learning and creativity.
The full article can be found in The MagPi 41 and was written by Mike Cook
You'll need
- Ikea Lillibo wooden train set (or similar)
- Optional Ikea Lillibo track extension pack
- 2× reed switches
- Connecting wire
- Silicon sealant
The project
This project uses the low-cost Ikea Lillibo wooden train set, although there are other, similar products available that might work just as well. The train and carriages are joined together with magnets, and it’s these magnets that are the key to detecting the train as it passes a point on the track.
The sensor is a simple reed switch. Reed switches come in many sizes and consist of two metal plates in a sealed glass tube. The idea is that the presence of a magnetic field close to them attracts the two plates together and they make contact. They are often used for door monitors in electronic security systems, and you can even get change-over switches. The ones we used on this project were 20mm long, although you can get both shorter and longer ones.
Actually, what we had planned to do was to drill a blind hole into the underside of the train and push a small round neodymium magnet in the hole. That’s when we discovered that the coupling magnets themselves were enough to trigger the reed switch, so no extra magnets were needed. We recessed the switch flush with the track – see the step-by-step guide below for details – then simply wired each switch between a GPIO pin and ground. The project requires two switches like this to work, but you could incorporate more. Our code uses GPIO pins 2 and 3.
Embedding the sensor switches
Rough out the recess
Drill a sequence of holes close to an open end of a length of track. Choose a drill size to match the diameter of your reed switch. Drill a blind hole to the depth of the reed switch’s diameter.
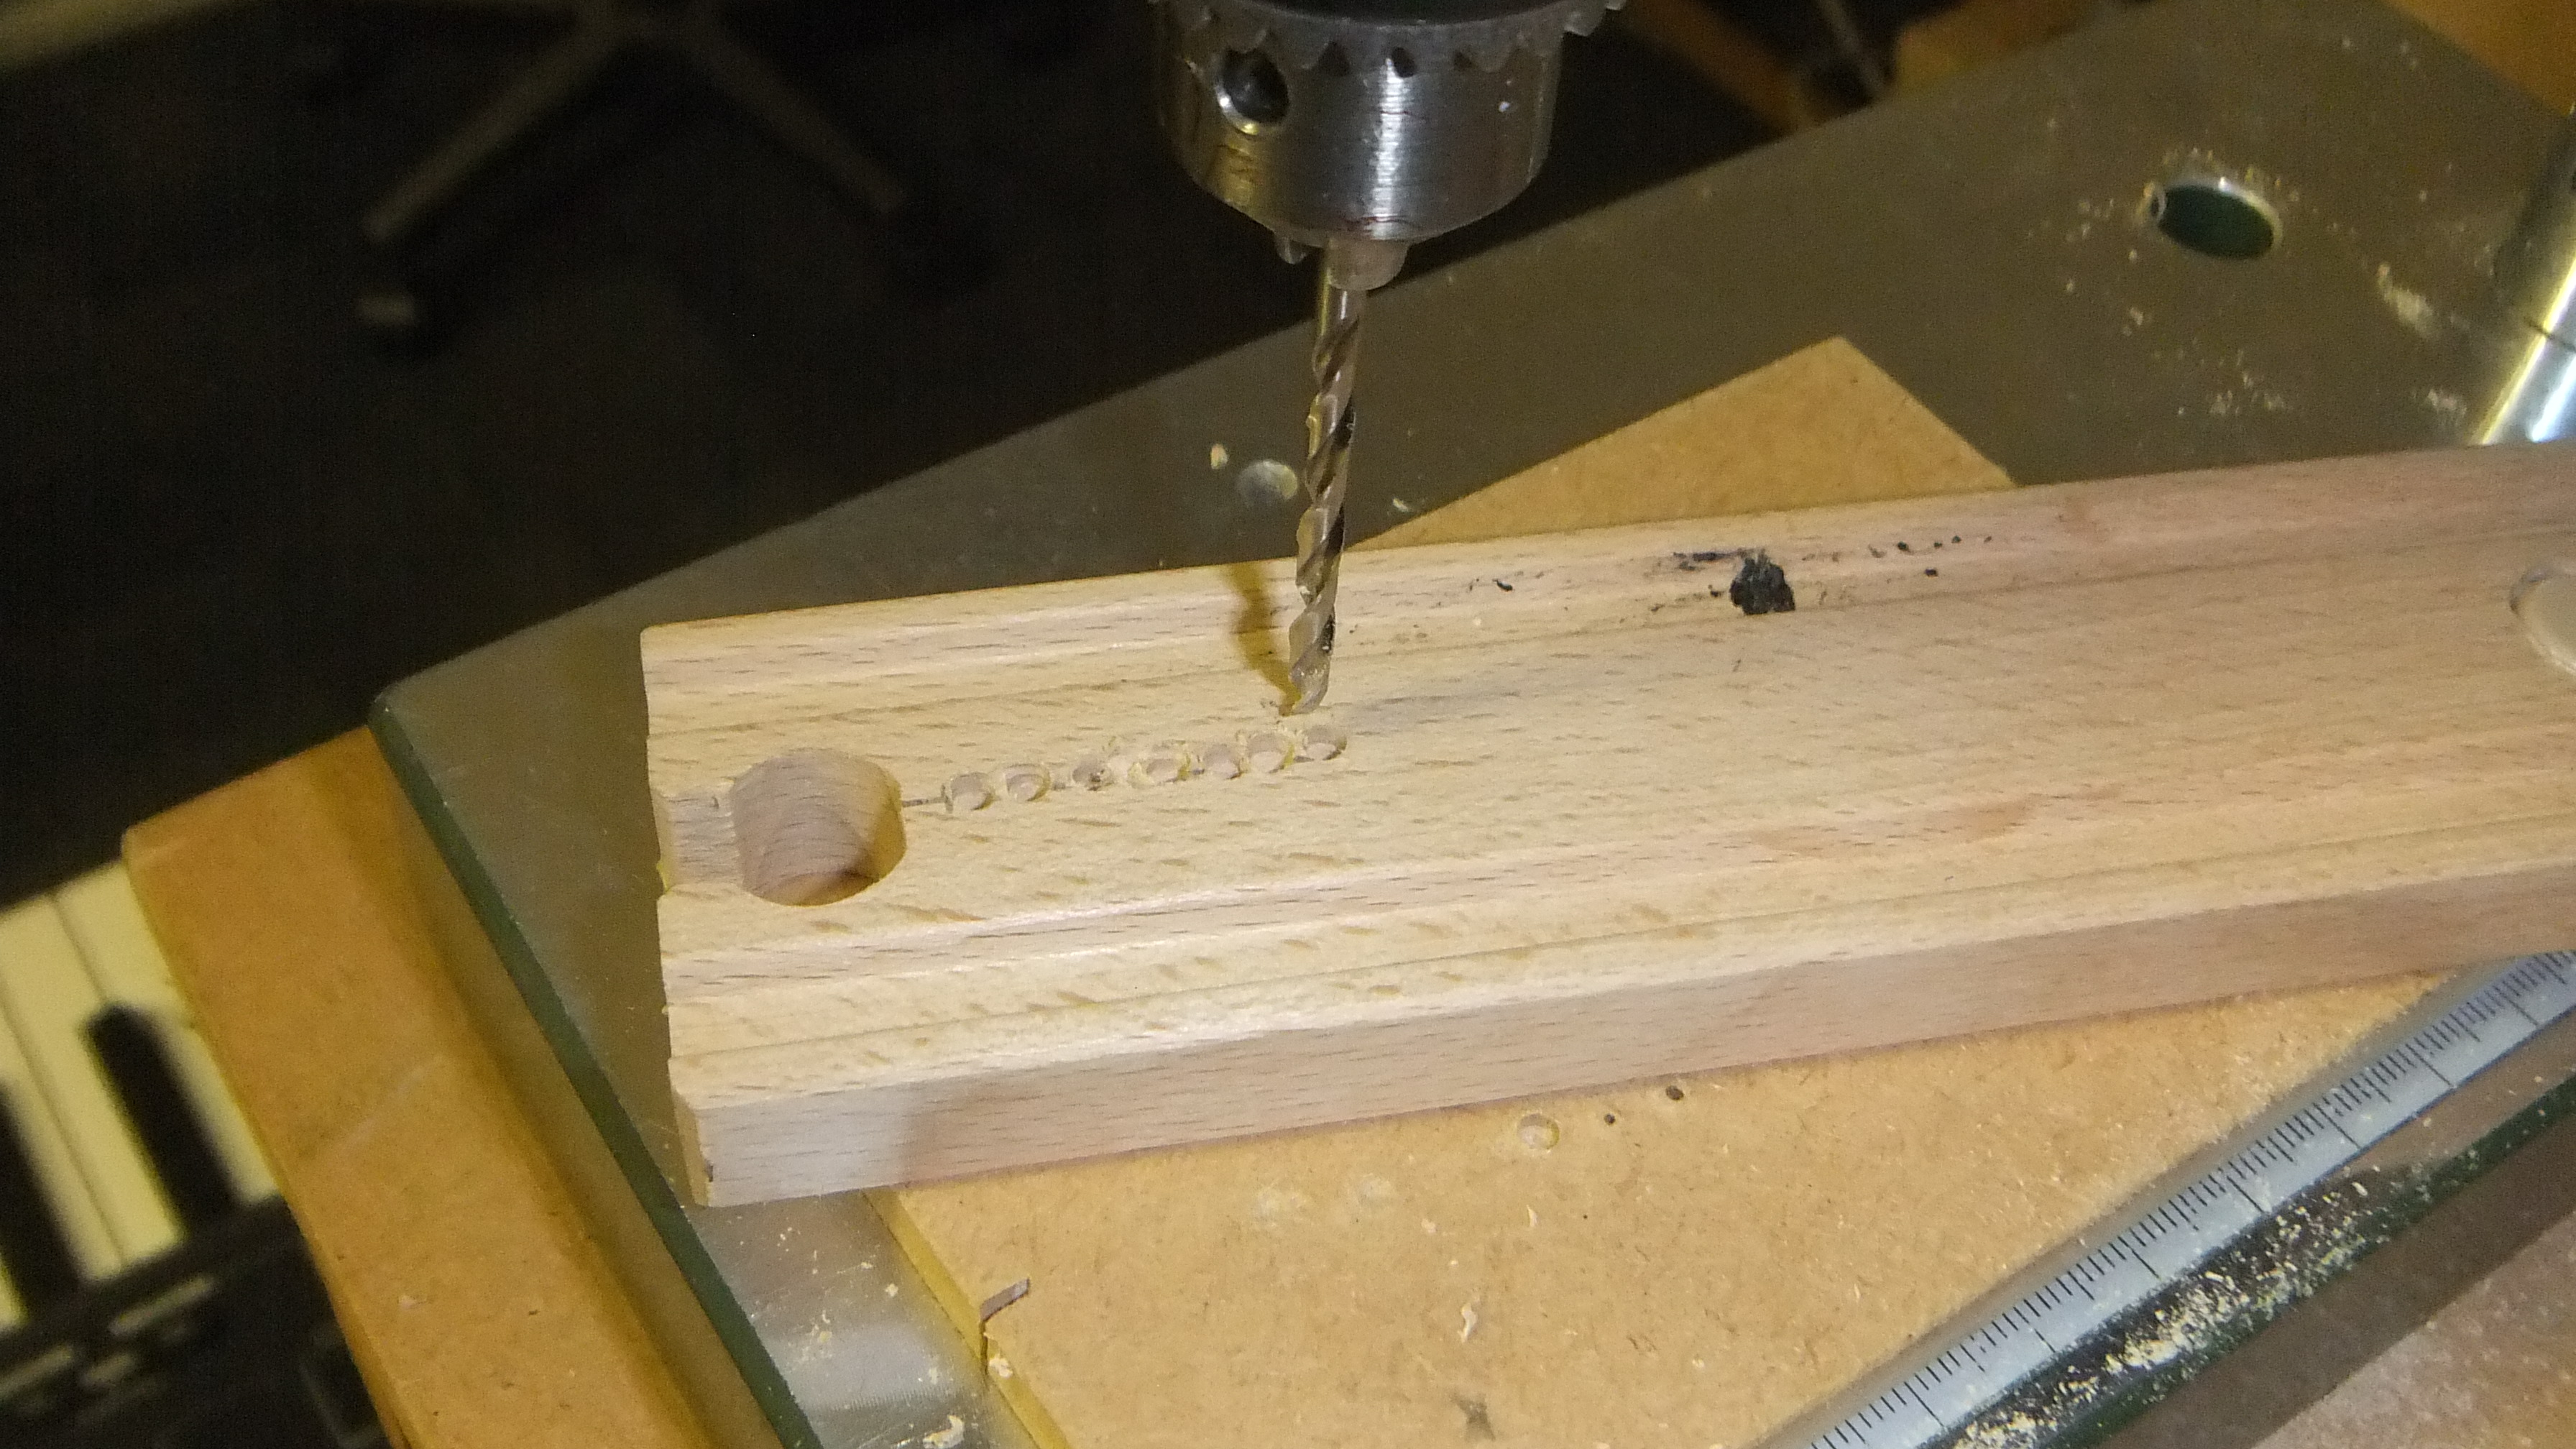
Finish the recess
Fit a router bit to the drill and join up the blind holes. Make a smooth recess so that the reed switch can sit flush with the surface of the rail.

Fit the wire
Drill in from the side to allow you to access the switch with the wire. You’ll have to cut a channel in the open end of the coupler, so that the wire doesn’t interfere with the next joining rail.

Fit the reed switch
Bend the wire from the reed switch into a loop. Make sure you have the pliers between the glass end and the bend, to avoid chipping the glass. Cut off the excess lead. Solder the screen to the end close to the join, and the core to the far end, for mechanical convenience.
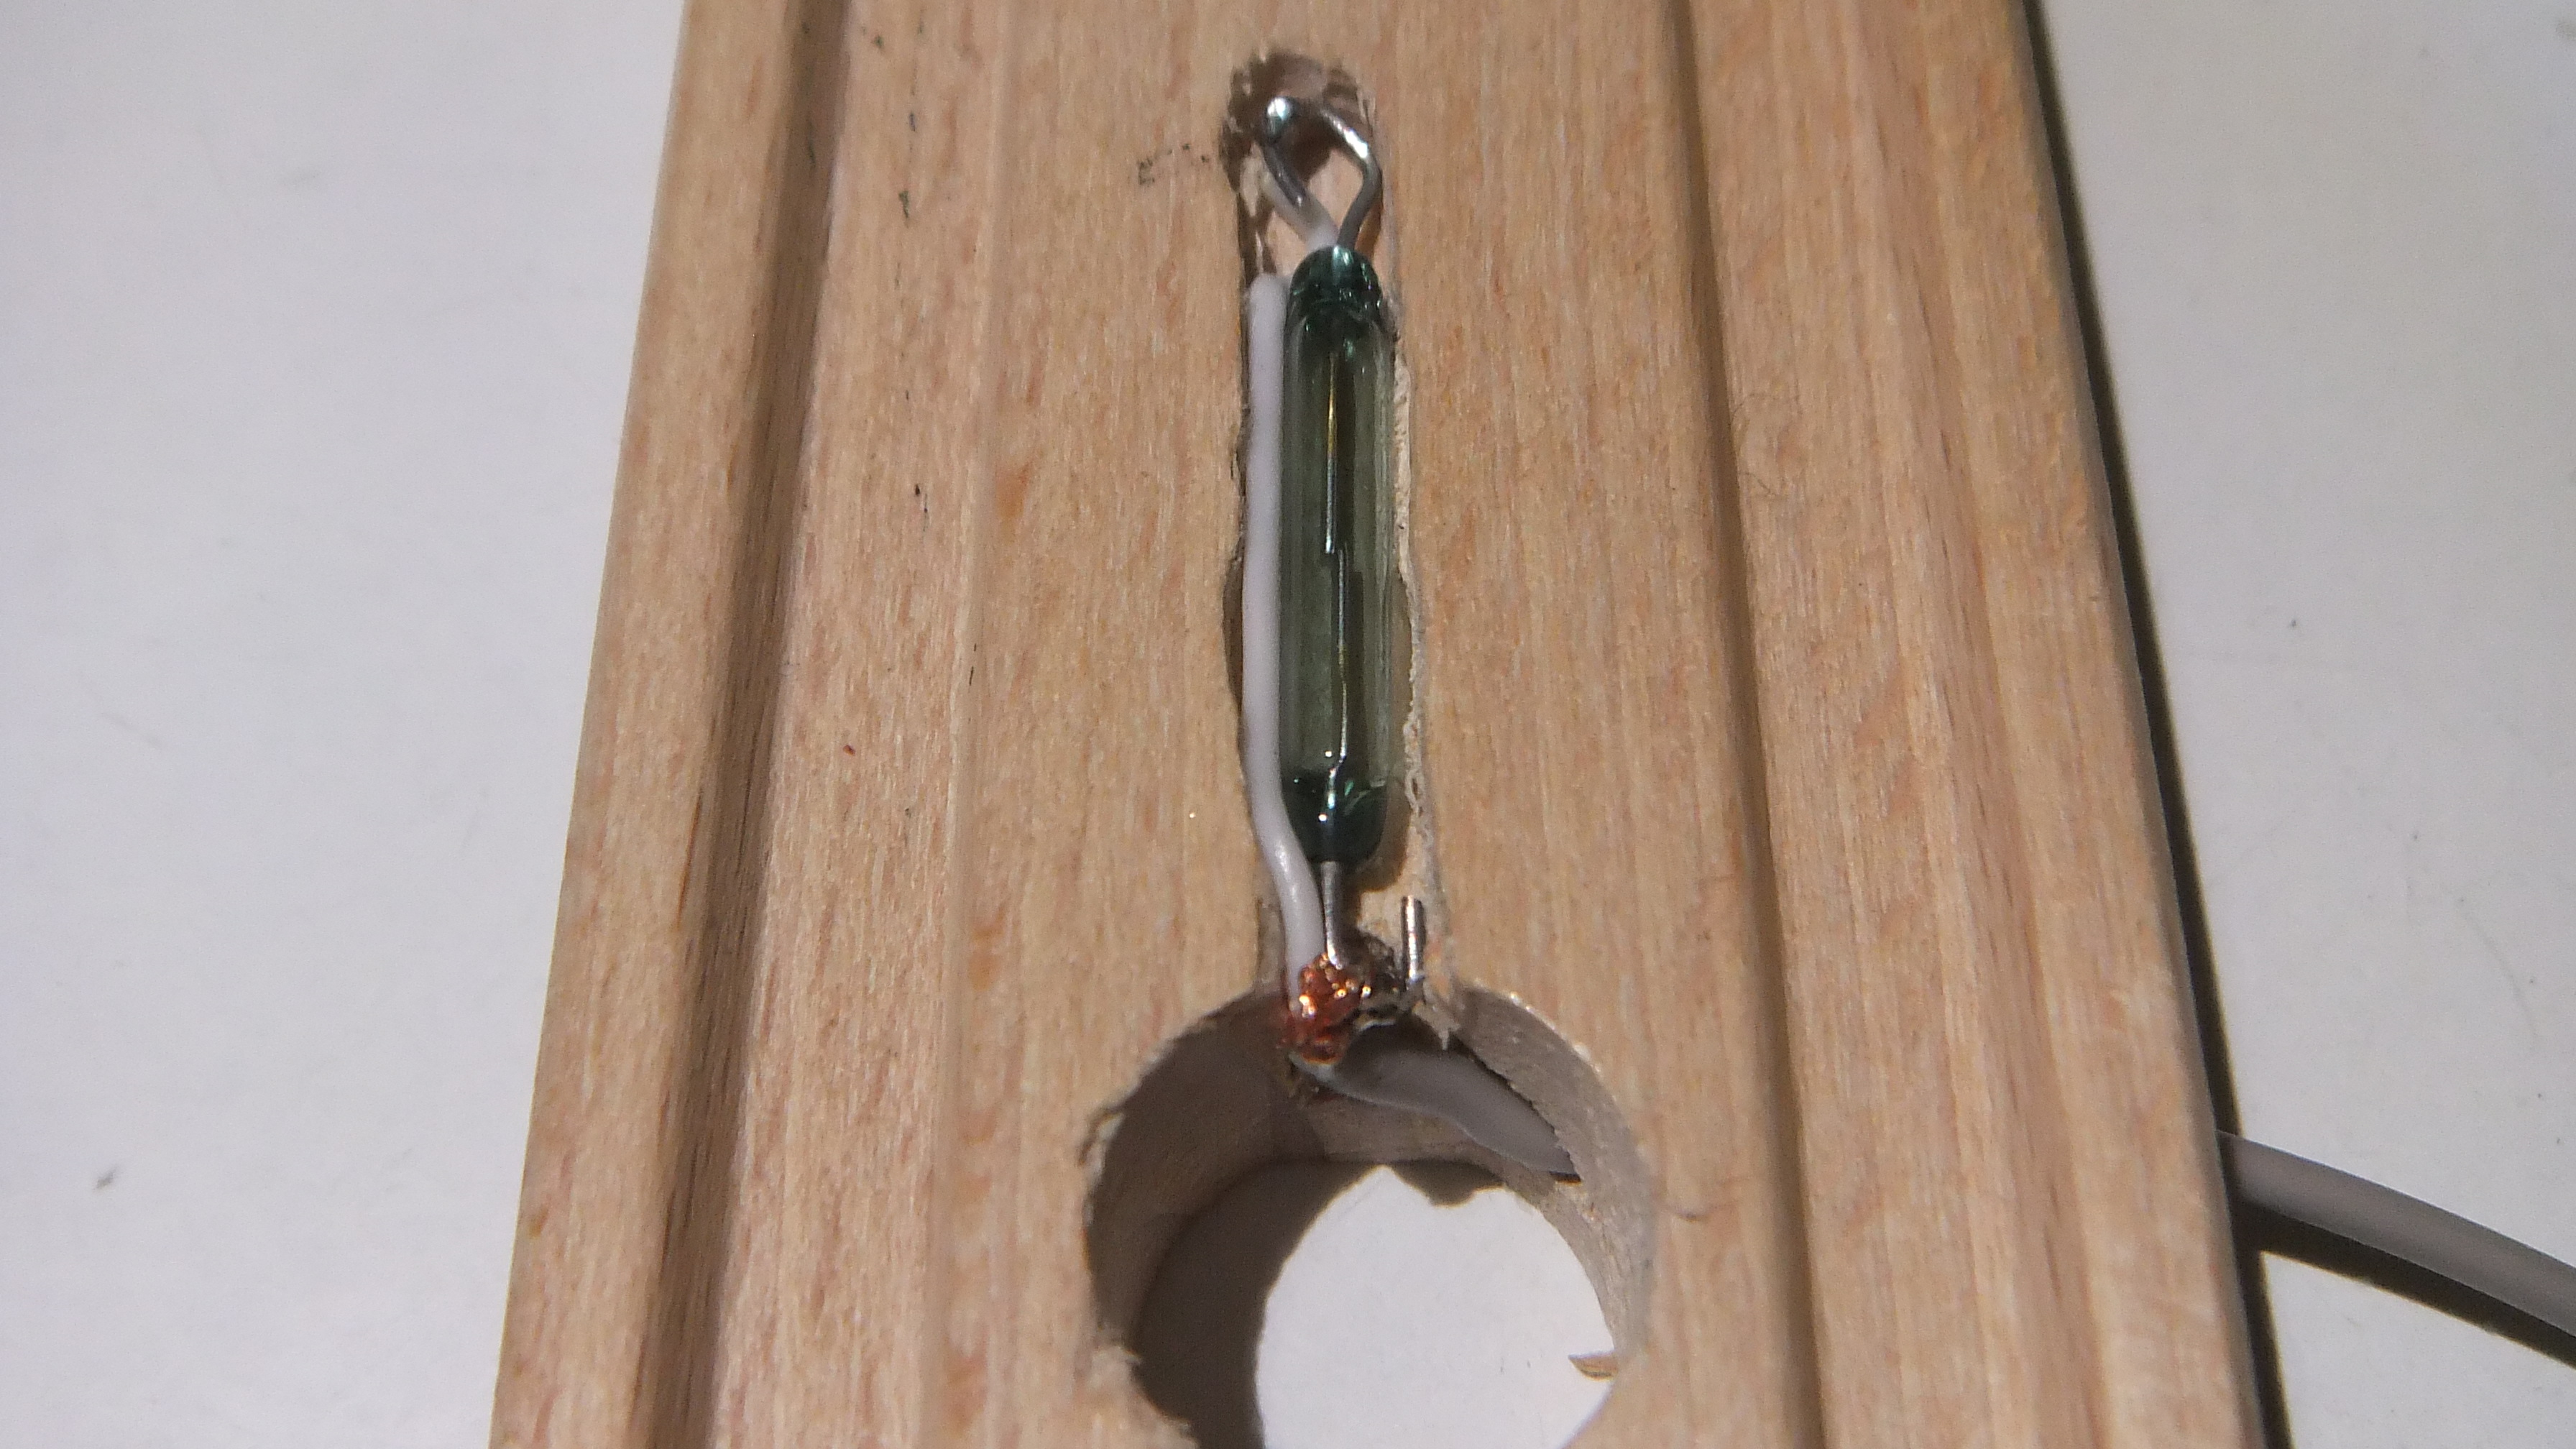
Seal the switch
Test to see the next rail can be fitted, and then fill the recess with silicon sealant and smooth it flush with the top of the rail.

The track layout
The wooden train track can be laid out in many different ways, although there are only two basic topologies: a loop or single-ended. We favour the loop because it’s obvious what you need to do to drive the story on. At the end of each page of the story, you just drive the train around the track to move on to the next page. At least two switches are required: one at point A, and the other at point B. However, this is not critical at all, as long as they are separated so that only one switch can be triggered at a time. You could use more switches at other parts of the track to trigger extra sound effects if you like. We found that someone had written a program to generate all the possible track layouts for the basic Lillibo set; the code can be found on their blog.
The software
The idea is that when the train pulls into the station, a page is produced and a sound sample is played. This page can be text, just pictures, or a mixture of both. When the page has been read and the sound sample played, the software looks for the other switch being triggered. When it sees that, a second sound effect is played and the program then looks for the station switch to be triggered before producing the next page. In this way, there’s no problem with contact bounce on the switches, nor from multiple triggering due to the carriage’s coupling magnets.
The media
The electronic book consists of a number of pages, each comprising a JPEG image file and a WAV sound file. These have to be prepared in advance, and these pages are what the Story Train is presenting as the story unfolds. Older children can write their own stories and draw accompanying pictures; youngsters or a teacher can write a story or borrow one from a book. The image files can be produced in any package; for keeping it all on the Pi, however, the Inkscape application is hard to beat, especially on the faster Model 2 Pi.
Each story is contained in its own directory, and this must conform to a fixed structure so that the software knows where things are. In each story directory, you need a ReadMe, which is just a blank file, although you can use it to put the story credits in: it’s just a target for selecting the story. You need nextComing.jpg and nextComing.wav files to indicate the next page is on its way. Finally, you need pages and sounds directories; into these you put the sound samples and the pictures that make up the story. Each needs a file called begin and one named theend, along with files called page01, page02… and so on. To clear up any questions, please look at the example story on GitHub, where you’ll find the program to drive this.
The code
The code listing drives this structure. It uses GPIO 2 and 3 as the switch inputs, but this can be changed to any two pins by changing the pinList list. The right cursor key acts as an ‘advance to next switch’ key – useful when testing a book before you hand it over. The code listing is below but can also be found on GitHub.
Taking it further
This is for a simple linear story. If you fit more than two switches to the track, however, you can get involved in creating interactive stories. The child then chooses one of two (or more) paths by driving the train round a different loop. You’ll need the extra track pack for this; it contains points, thus giving the choice of two routes.
We hope the Story Train can inspire new adventures in learning and creativity. Good luck.
Code listing
import wiringpi2 as io
from tkFileDialog import askopenfilename

pygame.init()                   # initialise graphics interface
pygame.mixer.quit()
pygame.mixer.init(frequency=22050, size=-16, channels=2, buffer=512)

os.environ['SDL_VIDEO_WINDOW_POS'] = 'center'
pygame.display.set_caption("The Story Train")
pygame.event.set_allowed(None)
pygame.event.set_allowed([pygame.KEYDOWN,pygame.QUIT])
screen = pygame.display.set_mode([600,400],0,32)

try :
   io.wiringPiSetupGpio()
except :
   print"start IDLE with 'gksudo idle' from command line"
   os._exit(1)

pinList= [2,3] # GPIO track sensing switches

def main():
   global pageList, pagesInStory
   initGPIO()
   print"The Story Train"
   while True:
      notFinished = True
      page = 1
      getStory() # get the story to show
      showPage(0) # beginning picture
      while notFinished:
        holdUntilSwitch(1)
        # trigger halfway round display
        showPage(-1)
        holdUntilSwitch(0)
        # display page sound and picture
        showPage(page)
        page += 1
        if page >= pagesInStory :
           notFinished = False
      showPage(pagesInStory) # the end
      time.sleep(2.0)

def initGPIO():
   for pin in range (0,len(pinList) ):
      io.pinMode(pinList[pin],0)
      io.pullUpDnControl(pinList[pin],2) # input enable pull-up

def holdUntilSwitch(pin):
   global advance
   advance = False
   while (io.digitalRead(pinList[pin]) == 1) and (advance == False):
         checkForEvent()
         time.sleep(0.2) # let other apps have a look in
   return

def showPage(page):
   pygame.draw.rect(screen, (0,0,0), (0,0,600,400),0)
   if page ==-1 :
      screen.blit(nextPicture,[0,0])
      nextSound.play()
   else :
      screen.blit(pagePictures[page],[0,0])
      pageSounds[page].play()
   pygame.display.update()
   time.sleep(0.4)

def getStory():  # get the list of pages to show
   global pagePictures, pageSounds, pagesInStory, nextSound, nextPicture
   pathP = "nothing"
   pathS = "nothing"
   while not(os.path.exists(pathP) and (os.path.exists(pathS)) ):
      checkForEvent()
      filename = askopenfilename()
      path = os.path.dirname(filename)
      pathP = path + "/pages/"
      pathS = path + "/sounds/"
   pageList = [os.path.join(pathP,fn) for fn in next(os.walk(pathP))[2]]
   list.sort(pageList) # put in alphabetical order
   pagePictures = [ pygame.image.load(pageList[frame]).convert_alpha()
                  for frame in range(1,len(pageList))]
   soundList = [os.path.join(pathS,fn) for fn in next(os.walk(pathS))[2]]
   list.sort(soundList) # put in alphabetical order
   pageSounds = [ pygame.mixer.Sound(soundList[frame])
              for frame in range(1,len(soundList))]
   pagesInStory = len(pagePictures)-1
   nextSound = pygame.mixer.Sound(path+"/nextComing.wav")
   nextPicture = pygame.image.load(path+"/nextComing.jpg").convert_alpha()

def terminate(): # close down the program
    print ("Closing down please wait")
    pygame.mixer.quit()
    pygame.quit() # close pygame
    os._exit(1)

def checkForEvent(): # see if we need to quit
    global advance
    event = pygame.event.poll()
    if event.type == pygame.QUIT :
         terminate()
    if event.type == pygame.KEYDOWN :
       if event.key == pygame.K_ESCAPE :
          terminate()
       if event.key == pygame.K_RIGHT :
          advance = True

# Main program logic:
if __name__ == '__main__':
    main()


