Remember screen savers? It occurred to us the other day that they’ve gone almost totally out of fashion, with turning your screen off being the preferred (and probably greener) solution to burn-in. One of the more popular screen savers of the time was a little display that showed number crunching from SETI, the organisation that looks for extraterrestrial life. With this screen saver, you’d also be lending some of your computer power to help them out.
The technology still exists with BOINC and is used in many more applications these days, such as protein folding and anything else that requires lots of processing power. We recently had a reader write in about using the idling CPU power of a Pi with it, so we decided to put together a little tutorial to let people share some Pi goodness with the science world.
You'll need
- BOINC
- A Raspberry Pi that’s on a lot
- An internet connection
STEP-01 Choosing a Pi
Not just any Raspberry Pi is suitable for running BOINC. If you’re making projects and using your Pi as a normal computer, you’re likely not going to have it idling often. The kind of Pi that works best for BOINC is something that’s on all the time, or at least for a long time each day: file servers, home automation, Christmas tree lights, and so on. These have a lot of processing power to spare, more than enough to lend some to another project using BOINC.
Remember, though: this does mean it will use up a little more electricity while performing BOINC tasks, so keep that in mind.
STEP-02 Installing BOINC
BOINC is included as one of the packages available for Raspbian, so installing it is pretty easy. First, you need to perform the customary update to the Raspberry Pi by opening a Terminal and entering:
sudo apt-get update
sudo apt-get upgrade
Once that’s complete, you can then install BOINC from the command line. Do this with:
sudo apt-get install boinc
This will install BOINC and the graphical BOINC Manager tool for easily accessing and controlling how you use BOINC. It even shows stats for your projects.
STEP-03 Open BOINC
BOINC works in both the command line and on the graphical desktop. It’s a bit more involved to get it working in the command line, but if that’s your preferred method, we suggest taking a look at this great tutorial on PiMyLifeUp.
For this tutorial, we’re going to be working in the desktop environment. Go to the top-left menu in Raspbian; under System Tools you’ll find the BOINC Manager. Open it up, and we can start choosing and adding projects to the system.
STEP-04 Choose a project
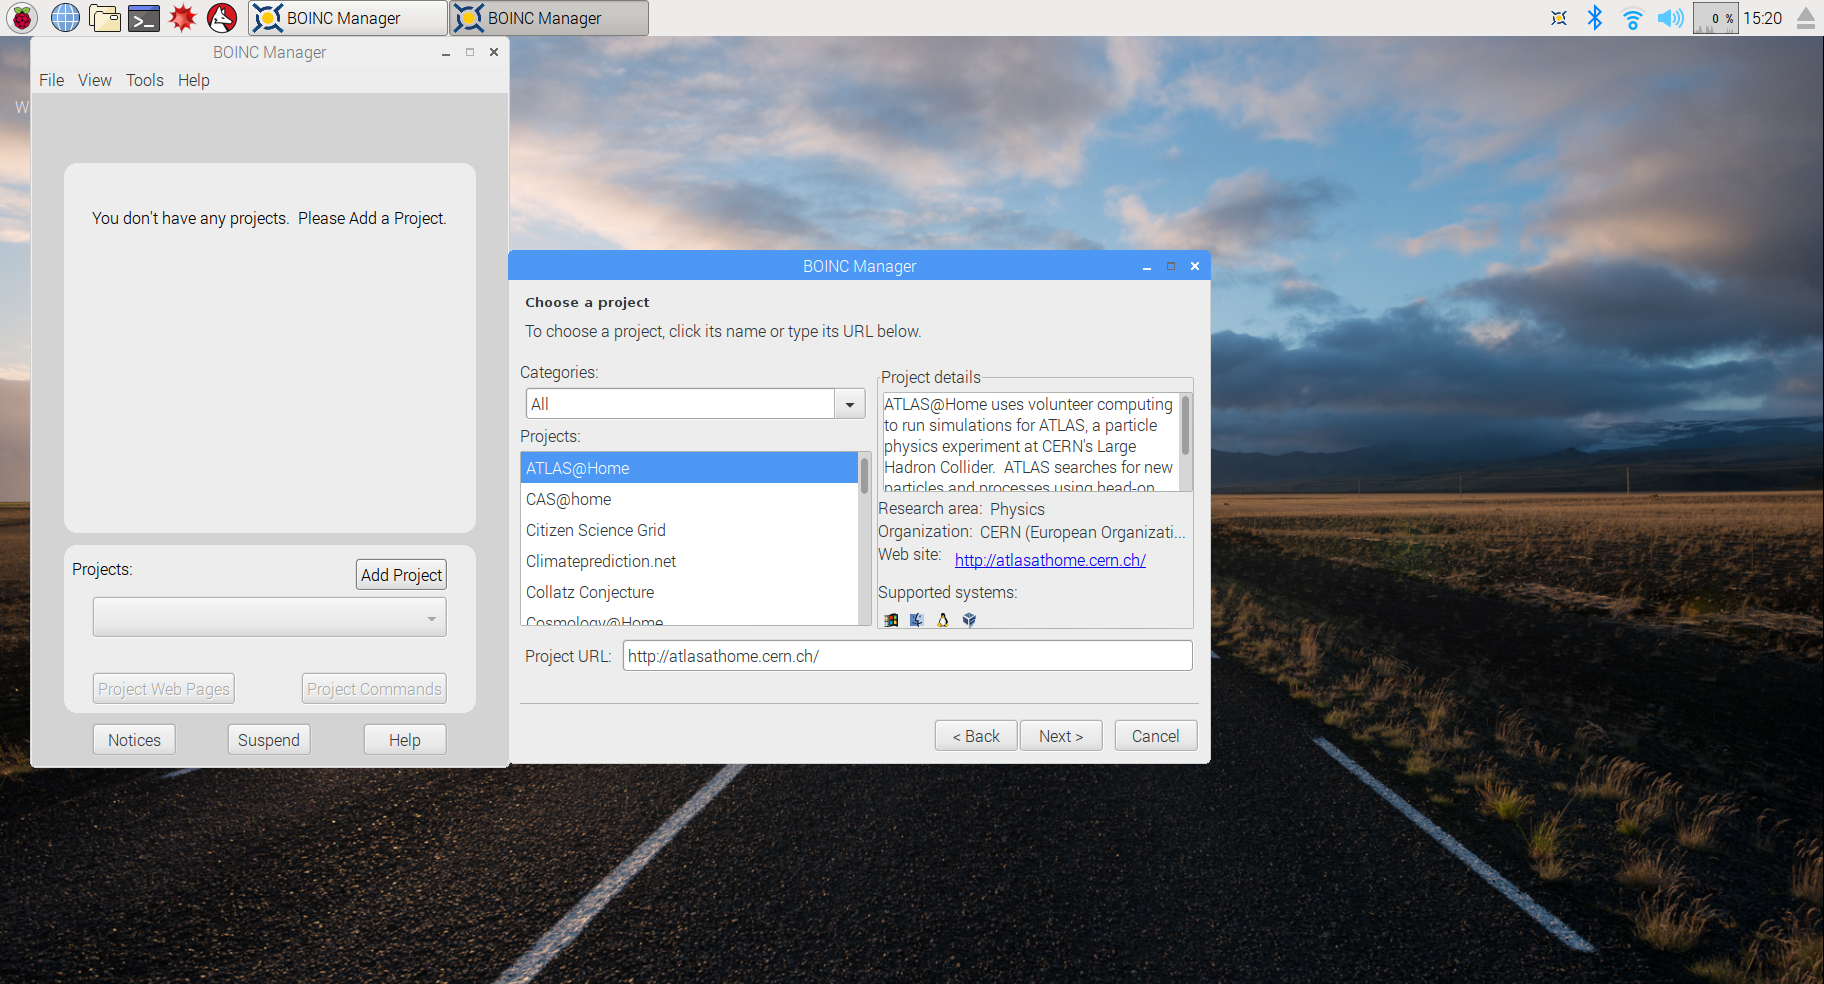
Choose ‘Add project’ on the screen and then go to Next. If you already have a BAM! or GridRepublic account, you can also add it here instead. You’ll then be presented with a list of projects you can join, such as the aforementioned SETI. They’ll usually give details on what they’re studying and how you can help them, but you might need to do some extra online research as well.
Click your choice and then press Next. From here you need to create an account (or log in if you already have one), and the project will be ready to start.

STEP-05 Configure BOINC
The default settings for BOINC are fine, but you might want to do a bit of tweaking anyway, especially to change what it considers as idle on your system. From the View menu, select Advanced View to access all the options. Here you can change not only the processor usage, but also set limits on network and disk/memory usage. You can even drill down a bit further into what tasks BOINC is running, how many resources it’s using, and further stats.
STEP-06 Run BOINC
All you need to do now is leave your Raspberry Pi and BOINC running. It will automatically take tasks from the project you signed up to and do some crunching on them. It may take a little while longer on the Pi than some other computers, but you’ll be doing your bit for science nonetheless. After reboots, you may need to double-check it’s running, and it’s best to check Pis that are on 24/7 every now and then to make sure they’re doing the job properly as well.


