Debian with Raspberry Pi Desktop is an operating system built by the folks at Raspberry Pi, and it has just been upgraded to the Debian Stretch edition.
It’s a great way to experiment with the clever Raspberry Pi environment, including all its specialist coding and resource tools, on old hardware.
However, this new update brings a really handy new tool called PiServer. Developed by the Raspberry Pi team, this piece of software enables you to boot Raspberry Pi devices from a Mac or PC running Debian with Raspberry Pi Desktop.
The idea is to use an old PC or Mac computer to boot multiple Raspberry Pi devices without requiring a microSD card for each Raspberry Pi 3 (only Raspberry Pi 3 boards support network boot at the moment).
PiServer is perfect for classrooms and coding groups. Users can log in to their account from any Raspberry Pi on the network, and access their saved files and programs. And you don’t need microSD cards for your Raspberry Pi.
You'll need
- Raspberry Pi 3
- PC or Mac
- Debian with Raspberry Pi Desktop
- Raspbian
STEP-01 Update to Stretch
You’ll need to install Debian with Raspberry Pi Desktop on an old Mac or PC desktop or laptop. If you haven’t already installed the Raspberry Pi operating system on a Mac or PC, there's a guide to help you. If you’ve installed it previously, you’ll need to upgrade to Stretch, so open a Terminal window and enter:
sudo nano /etc/apt/sources.list
sudo nano /etc/apt/sources.list.d/raspi.list
In both files, change every occurrence of the word ‘jessie’ to ‘stretch’. When that’s done, enter the following commands:
sudo apt-get update
sudo dpkg --force-depends -r libwebkitgtk-3.0-common
sudo apt-get -f install
sudo apt-get dist-upgrade
sudo apt-get install python3-thonny
sudo apt-get install sonic-pi=2.10.0~repack-rpt1+2
sudo apt-get install piserver
sudo apt-get install usbbootgui

STEP-02 Set up network boot
Now you need to set up network boot on each Raspberry Pi 3 you intend to use. For this, you’ll need a microSD card with a fresh installation of Raspbian. You only need the microSD card to enable network boot.
Boot the Raspberry Pi and enter the following:
sudo apt-get update && sudo apt-get upgrade
sudo nano /boot/config.txt
Add this line to the end of the file:
program_usb_boot_mode=1
Save and quit (CTRL+O; CTRL+X) and reboot your Raspberry Pi.
sudo shutdown -r now
Check it with:
vcgencmd otp_dump | grep 17:
Ensure the output says ‘17:3020000a’. The client configuration is almost done. The final thing to do is to use:
sudo nano /boot/config.txt
…and remove the programusbboot_mode line from config.txt (make sure there is no blank line at the end). See ‘Network Boot your Raspberry Pi’ for more information (magpi.cc/2BUVCd7) on setting up network boot.
Finally, shut the client Raspberry Pi down with sudo shutdown -h now. Remove the microSD card.

STEP-03 Open PiServer
Back in Debian with Raspberry Pi Desktop, open the PiServer app (Preferences > PiServer). Read the Introduction and click Next.
Make sure the Raspberry Pi you want to boot has the microSD card removed, and an Ethernet cable attached. Connect the power supply to the Raspberry Pi. You should see a MAC address (six hexadecimal digits) appear in the list.
Make sure a tick is next to the MAC address of your Raspberry Pi and click Next.

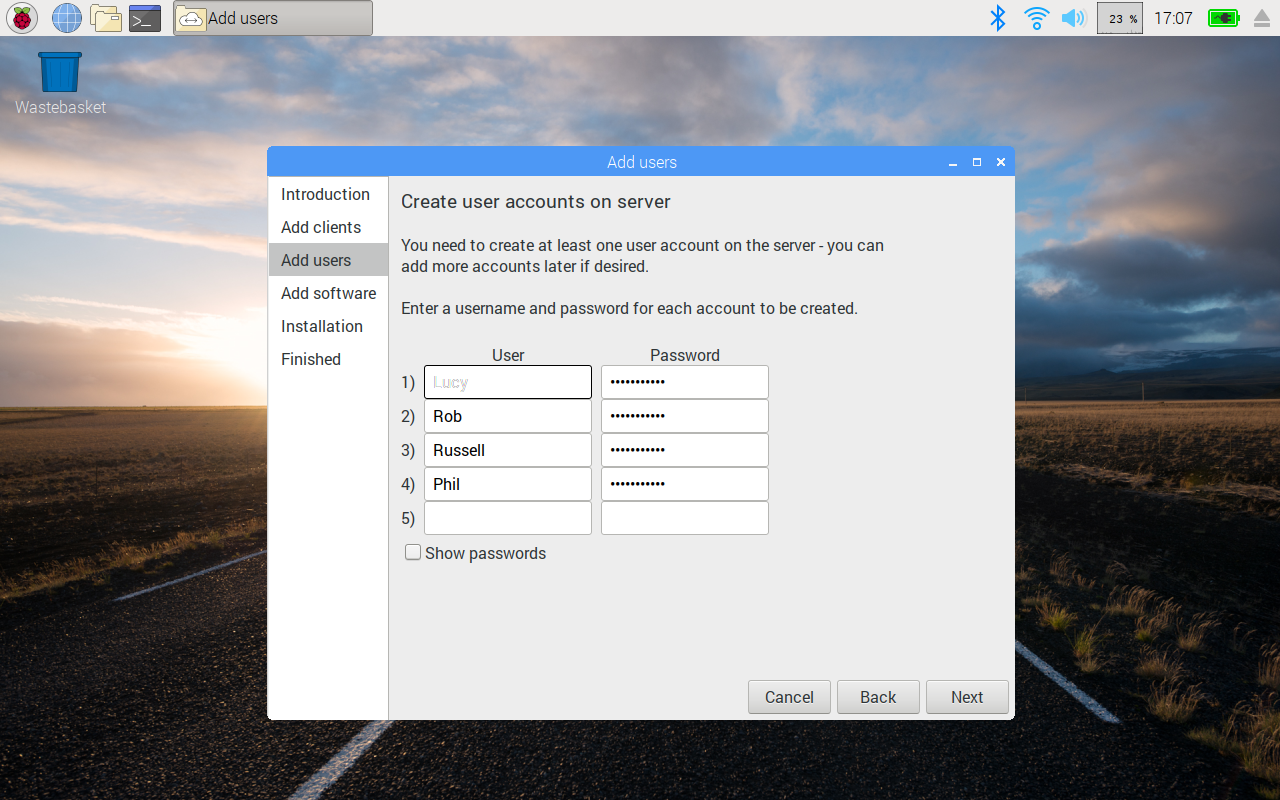
STEP-04 Create user
Now enter a name for the user who is going to connect. You can add multiple users and passwords (one for each child in a school, for example). Fill out the User and Password fields for each user and click Next.
STEP-05 Install OS
Now choose the operating system you wish to install on the Raspberry Pi. By default you have two options:
Raspbian
Raspbian Lite
You can also upload operating systems from local files or enter a URL. Make sure Raspbian (not Raspbian Lite) is selected for our test, and click Next. Wait while it installs the software (it took us around five minutes – it depends on your network speed).

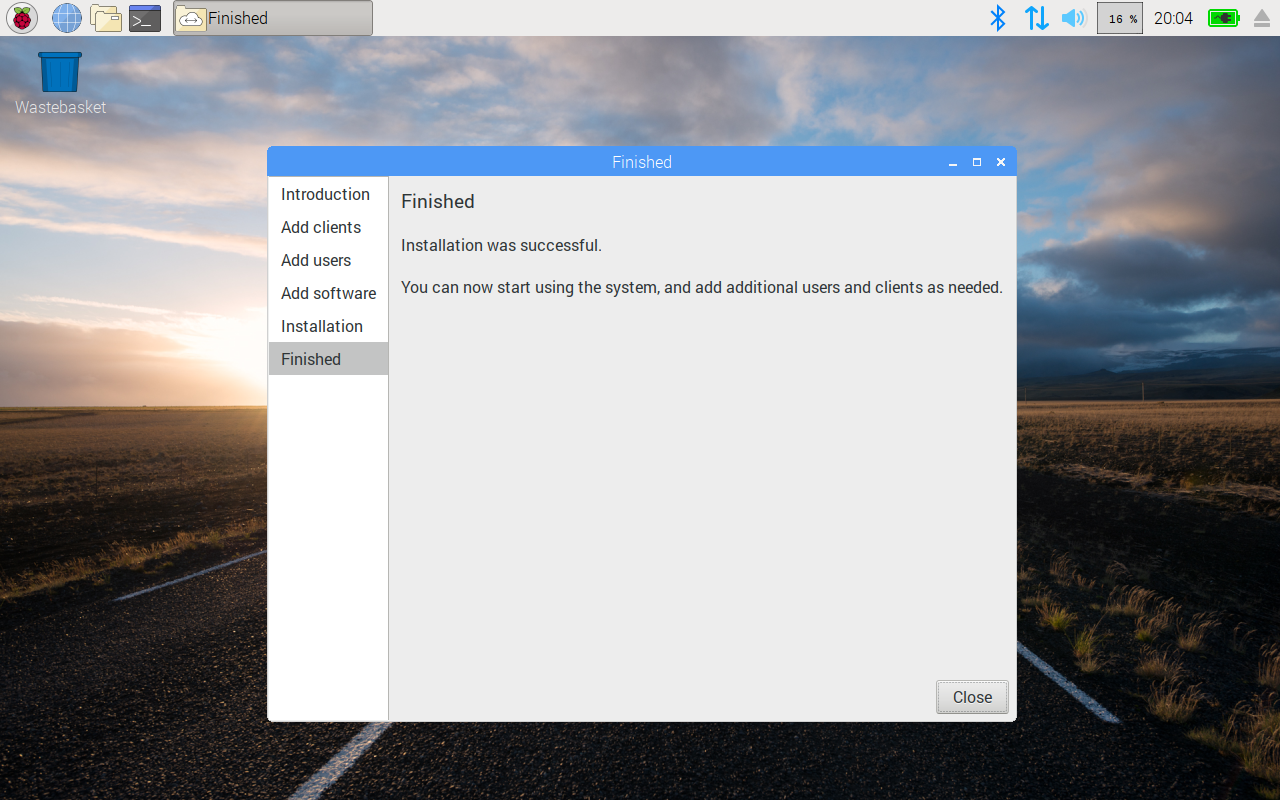
STEP-06 Run the Raspberry Pi
With the installation finished, you’ll see the main interface. On the sidebar you will see Uses and Clients (use the Add and Remove options to manage both). You can also use the Software option to run different operating systems. Raspberry Pi devices connected to the network will boot into the selected operating system, and users can log in using their name and details.