In this simple, easy-to-follow tutorial, we’ll be showing you how to hook up your Pi Zero to a TV via an RCA cable. That’s right – believe it or not, the Pi Zero isn’t limited to just HDMI video. By soldering a header pin, hooking up a couple of jumper wires, and adding a screw terminal RCA connector, you can easily access the RCA video output so you can use an old CRT TV in your next Raspberry Pi project.
The full article can be found in The MagPi 44
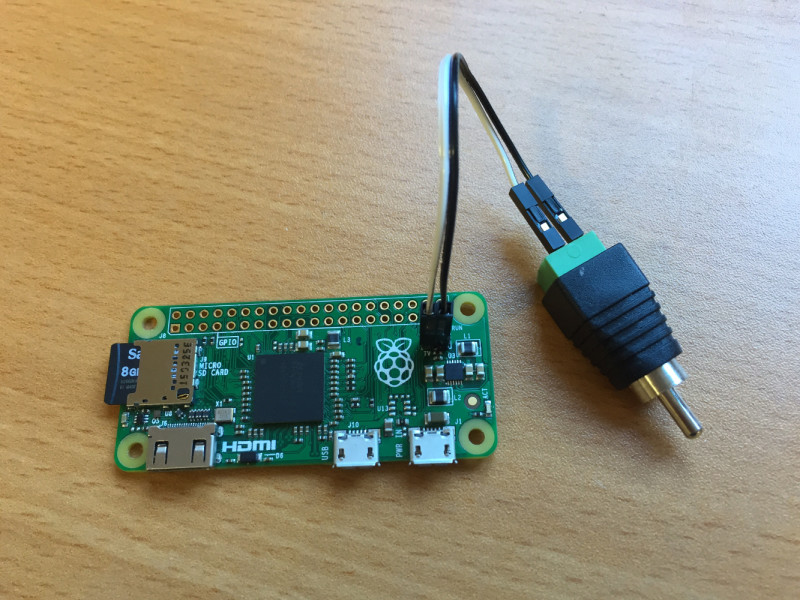
We’re going to be soldering two pin headers onto the Pi Zero. Start by soldering a pin header to the square pad labelled ‘TV’ on your Pi, then solder another header onto the circle pad next to the square pad. Both pads are contained within a white outline. See image below for reference.

You could solder wires directly to these pins, but by using pin headers you get a nice neat solution that allows your connection to be removed when required. Once the headers have been soldered to your Pi, you can then move on to attaching the jumper wires to your RCA screw terminal. Using the male side of the jumper wire, attach them to each of the terminals, making sure to screw them up nice and tight. Make a note of which wire is plugged into the positive pin and negative pin.
Now plug each of the wires into the pin headers you previously soldered onto your Pi. Make sure the wire connected to the positive terminal is connected to the pin labelled ‘TV’.
That’s it for setting up the hardware. Now your Pi should automatically detect which video method you’re using, either HDMI or RCA. If it doesn’t, however, read on and follow our software configuration to get it working.
Setting up the software
First things first: either SSH into your Raspberry Pi, or open up a terminal window.
We need to make some changes to the config.txt file, but before we do that it’s probably a good idea to make a backup of the original, just in case:
sudo cp /boot/config.txt /boot/config.txt_backup
Now we have our backup, we can edit the original and make some changes. Start by opening config.txt in your editor of choice. We’ll be using nano:
sudo nano /boot/config.txt
There are two lines in the file that you need to edit. Firstly, you need to remove the comment ‘#’ from the following line:
#sdtv_mode=2
So it should now look like this:
sdtv_mode=2
Then we need to add a comment ‘#’ to the following line:
hdmi_force_hotplug=1
So it should now look like this:
# hdmi_force_hotplug=1
That’s it. Remember to save your file – if you used nano, press CTRL+X to exit; then, when asked if you want to save changes, enter Y then press RETURN.
Now you can plug your RCA cable into your TV/monitor, and you should hopefully see the video output.


