
Making a truly good cup of coffee takes a lot of effort. Essential oils evaporate from ground coffee within minutes, so pre-ground coffee is out. Boiling water will burn the coffee as it’s brewed, so you need it at about 80-85°C. Grind size, exact weights, precise timing, brewing method: all of it is important when making coffee. Possibly the most extreme step you can take is to roast your own beans to make sure they’re fresh and to your own requirements, and this is what Mark Sanders has found himself doing.
“While in search of quality coffee, I stumbled upon a webpage that suggested home roasting as a source of tasty coffee,” Mark tells us. “Getting started is as simple as purchasing a used popcorn popper from the local thrift store for $4-$8.”
Popcorn poppers are popular among home-roasters, as they stir the beans while very hot air blows on them – very similar to commercial coffee roasters. There was a small problem, though, according to Mark:
“It roasted the coffee too fast, as I frequently finished roasts in under five minutes [when they should take 7-12]. In order to slow the roast down, I would unplug the popper for 30-second intervals. This grew tiresome and I started to ponder how I could add temperature control to the popper. This was the beginning of my Raspberry Pi project.”
The solution is familiar to those who have tried (or at least seen) sous vide projects: controlling the heating apparatus. In this case, Mark cannibalised the parts from the popper and used them in another vessel.
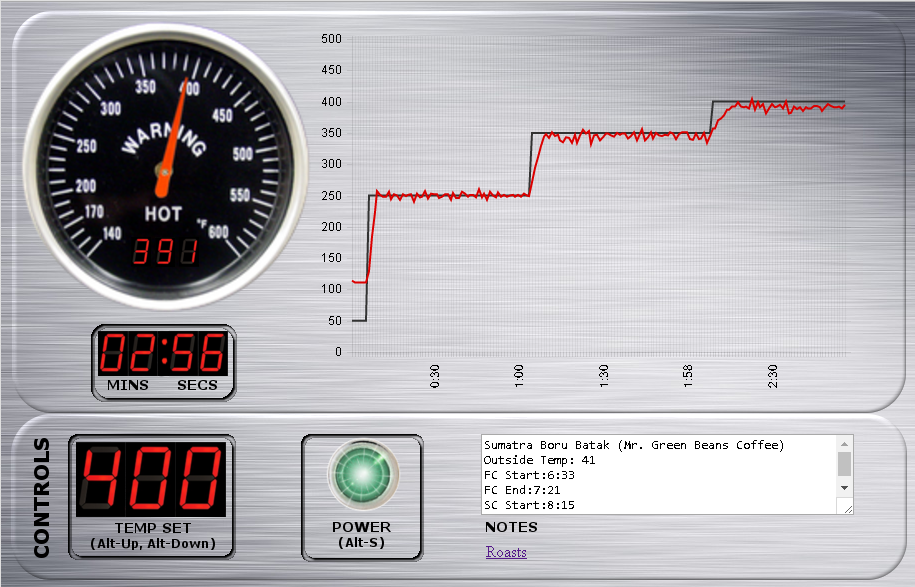
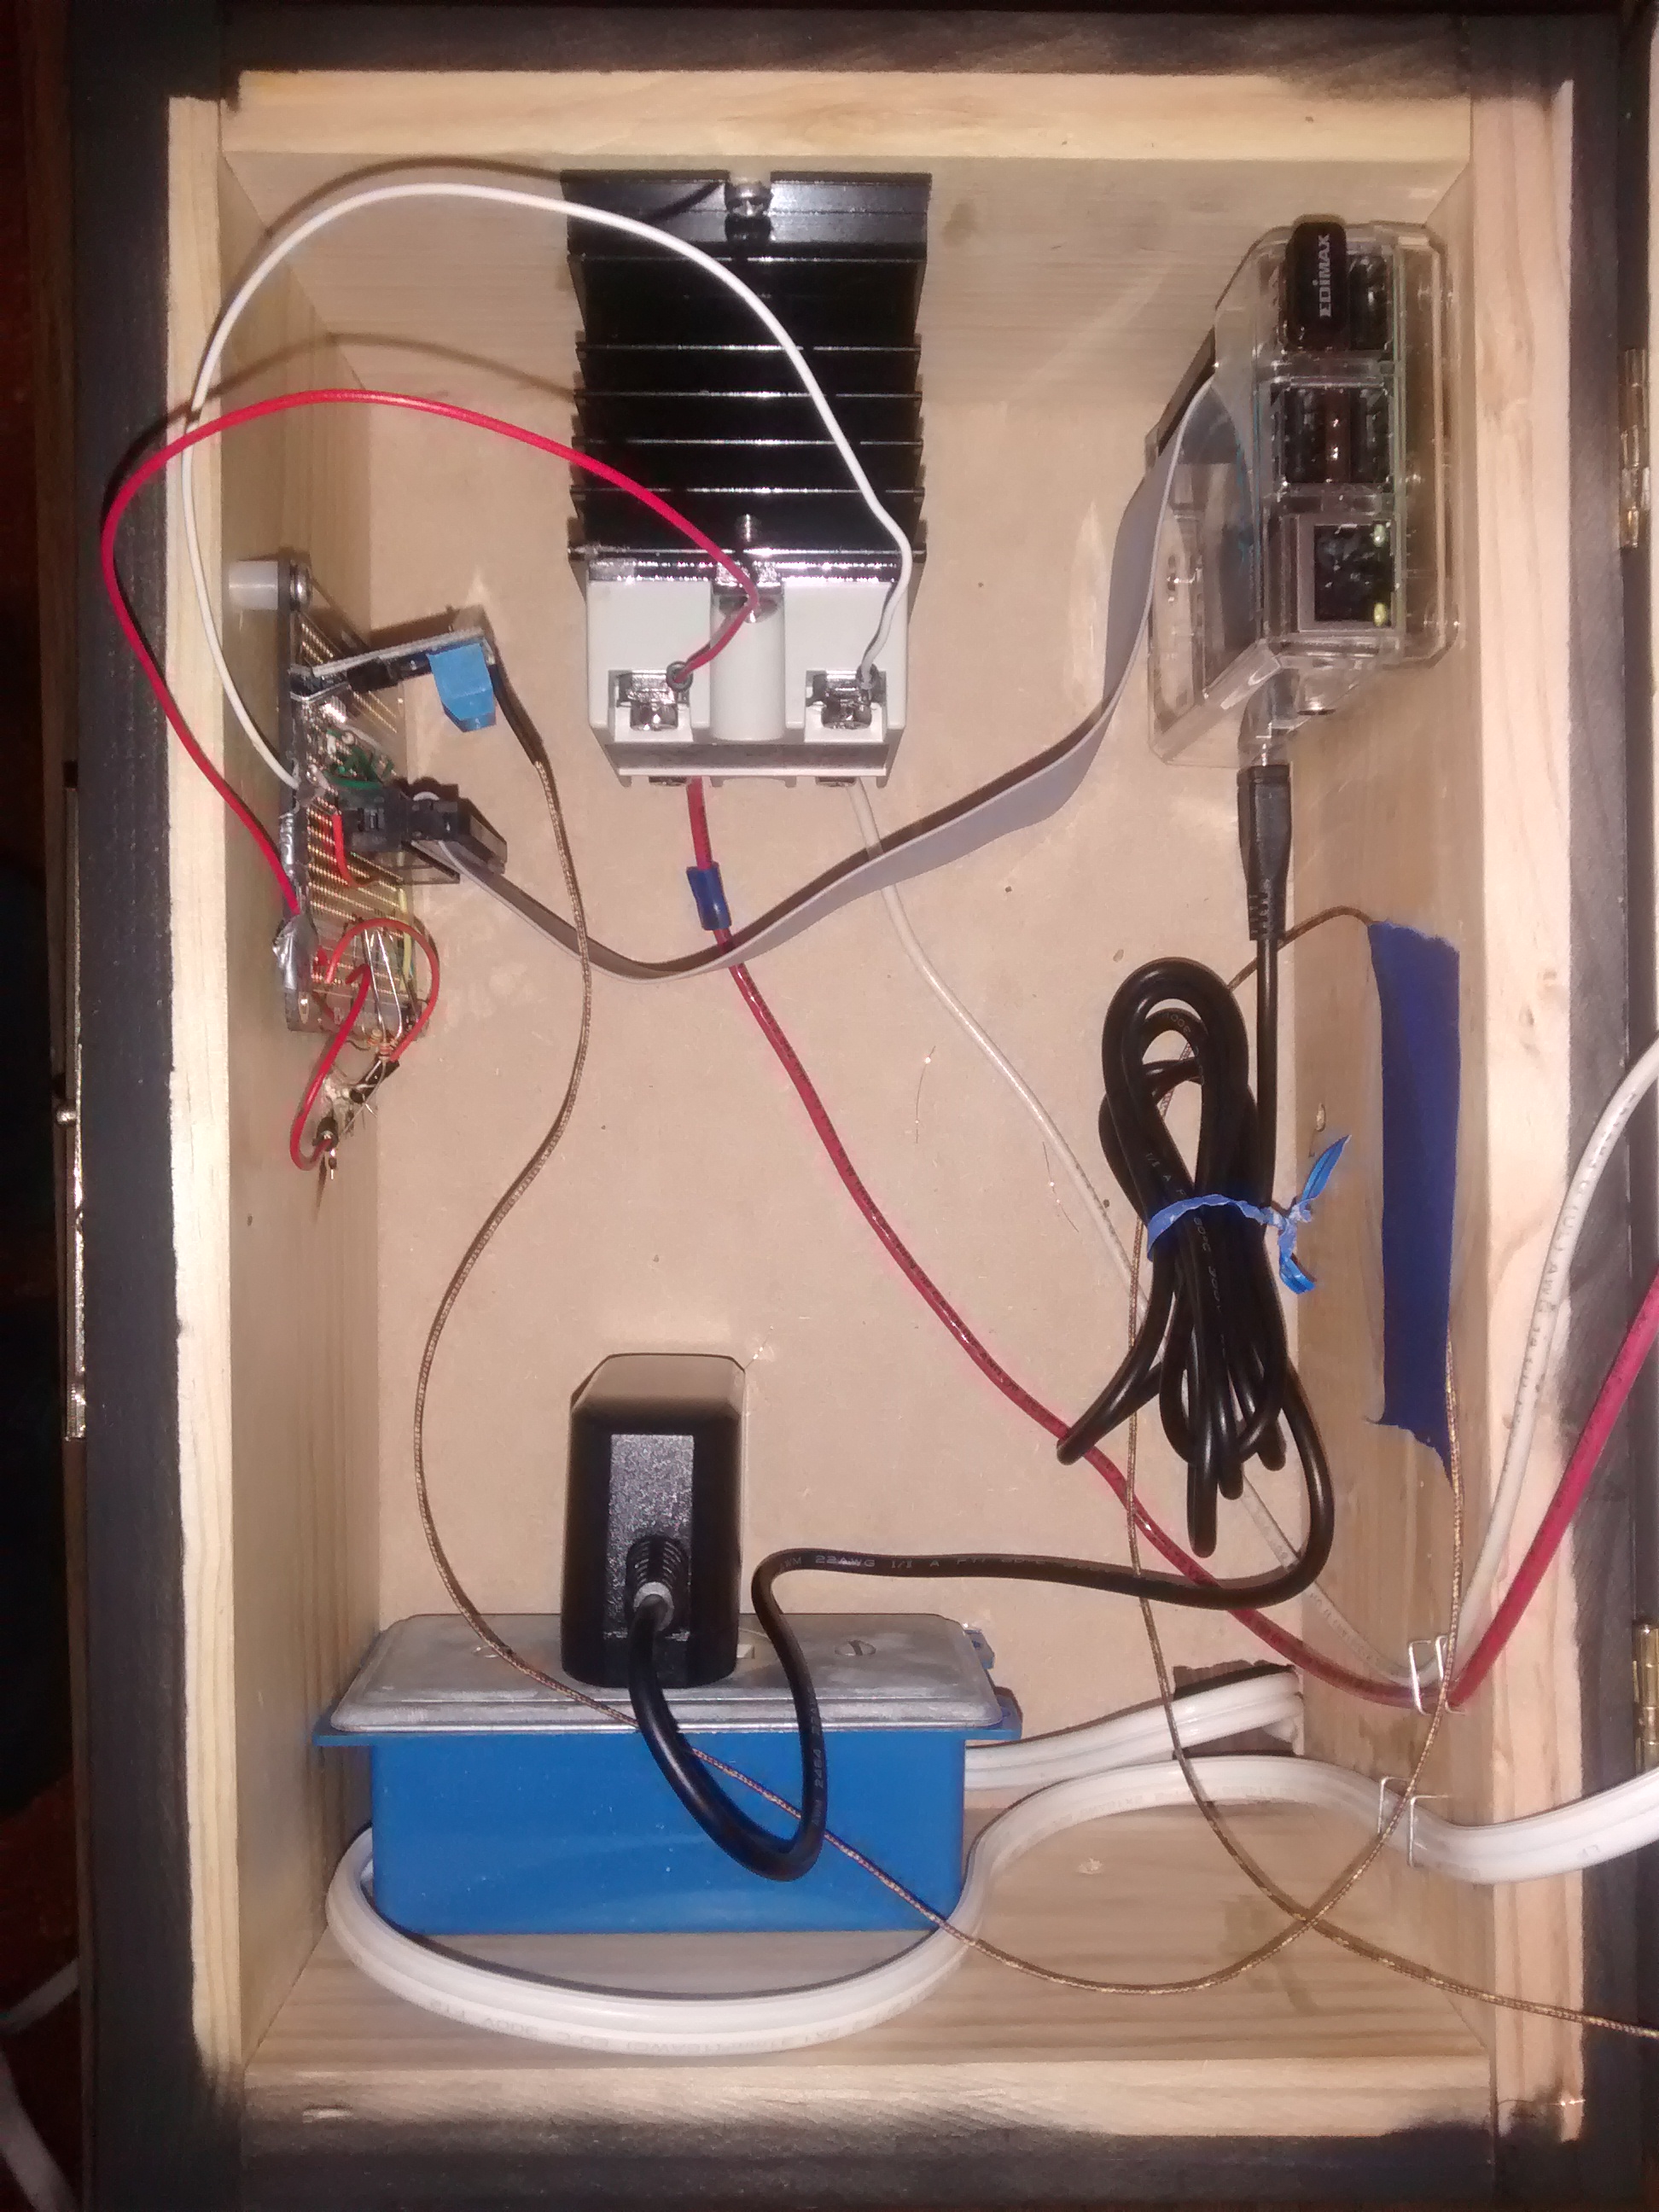
“I took the heater and fan from a popper and added several other components to create a temperature-controlled coffee roaster,” Mark explains. “A thermocouple was added to measure the temperature inside the roasting chamber. A GPIO pin was connected to an AC relay that allowed the Raspberry Pi to control the popper’s heater. I developed a web interface to set the temperature and save roast data for archiving. The web interface shows the current temperature using an analogue dial gauge, as well as a chart that graphs the temperature for the entire roast. For some extra flair, four LEDs were added to the front of the roaster to simulate a flame when the heater is turned on.”
A full list of parts and instructions to build a roaster yourself is available online. The build is quite fiddly, with a lot of soldering and patience required, according to Mark. However, the results speak for themselves:
“[The roaster] has completed over 20 roasts and it has worked very well. I’m able to control the temperature throughout the entire roast process, log notes about the roast, and save the roast data for reference later. It’s much better than unplugging and plugging in the popper by hand.”


