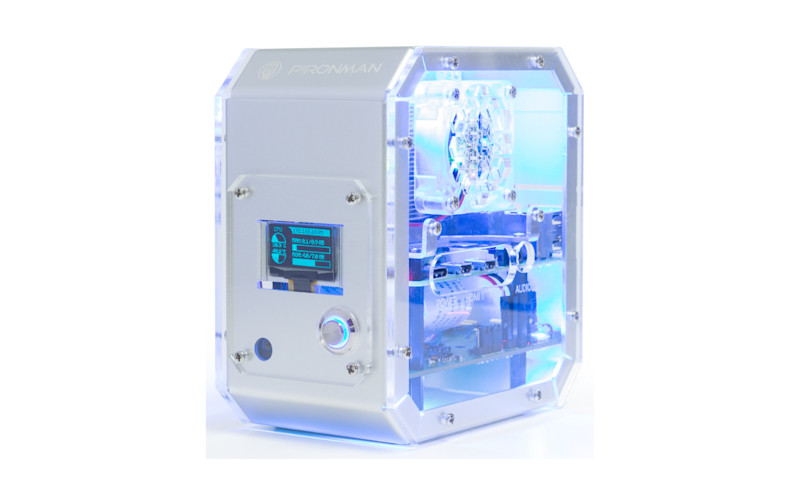
Putting it together
The build process for Pironman is long and fiddly. The case itself comes partially assembled, but immediately requires disassembly to fit your Raspberry Pi inside. There then follows a 24-step assembly process that involves multiple flat conductor cables (FCC) to wire together the OLED display, SD card extender, and GPIO connector.
There are also multiple standoffs to connect the Pironman board underneath your Raspberry Pi 4 board. In total, we counted 28 different types of component in the case.

There are multiple opportunities for the build to go wrong. In this instance, however, ours booted up and worked the first time. Still, the build took us around three careful hours to complete.
The end result is cute, in a slightly hacked-together way with plenty of screws and gaps. It’s nowhere near as polished as some of the other cases on the market. But it is packed with components with a unique charm.
Verdict
8/10
A complex build results in a charming, if slightly hacky, micro PC-tower-style case with a range of interesting components.
Specs
Case: Aluminium tower case for Raspberry Pi 4 Model B (not compatible with Raspberry Pi 3)
Internals: Ice tower cooler with 5 mm copper pipe; Silent RGB fan with temperature control; On-board USB to M.2 SATA SSD, Supports TRIM and UASP; Available SSD Lengths: 22 mm × 30 mm, 42 mm, 60 mm, and 80 mm; Programmable 0.96˝ OLED
I/O: IR receiver for media centre; Power button for safe shutdown


