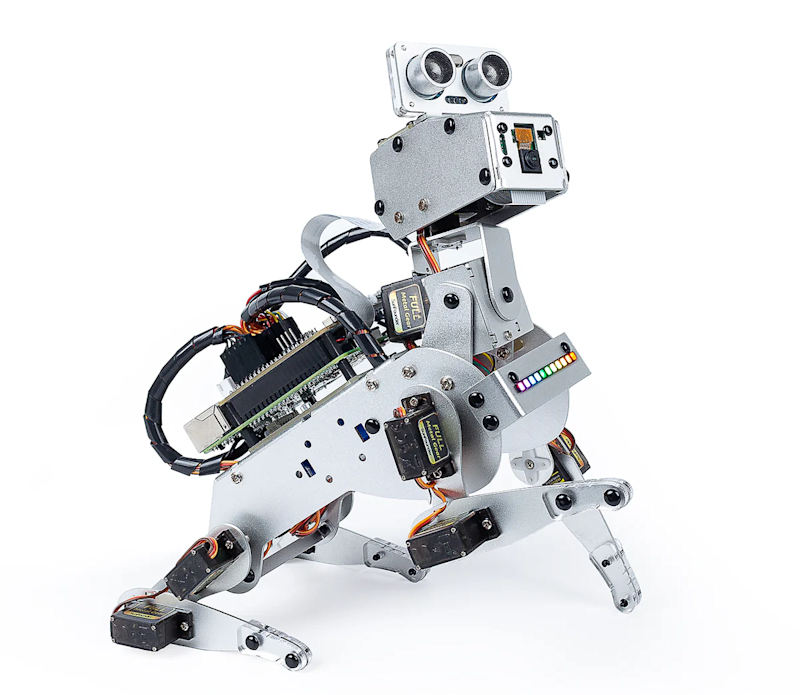
The first thing to decide is which Raspberry Pi model to use before assembling the kit. PiDog will work with Raspberry Pi 4, 3B+, 3B, and Zero 2 W. Using a Raspberry Pi 5 is not recommended since its extra power requirements put too much of a strain on the battery power – PiDog uses a lot of current when standing or moving – so it’s likely to suffer from under-voltage. We opted for a Raspberry Pi 4, although even then we did have a few issues with crashes when the battery level was low.
Canine construction
With a kit comprising a huge array of parts, building a PiDog is no mean feat. We reckon it took us around five to six hours, although we were taking our time to get it right. The printed diagram-based instructions are easy to follow, however, and there are online videos if you get stuck. Apart from a few fiddly bits, including manipulating some tiny screws and nuts, it’s an enjoyable process. Helpfully, the fixtures and fittings – including numerous sizes of screws and plastic rivets – come in labelled bags. The kit includes a couple of screwdrivers too.
The main chassis is built from aluminium alloy panels, giving this dog a shiny and robust ‘coat’. There are also several acrylic pieces, including some to build a stand to place PiDog on when calibrating its leg servos. A nice touch.

Raspberry Pi sits on a sound direction sensor module and is then mounted with a Robot HAT which handles all the servos (via PWM pins), sensor inputs, and battery management. Portable power is supplied by a custom battery pack comprising two 18650 batteries with a capacity of 2000mAh, which takes a couple of hours to charge fully.
Doggy-do code
Once you’ve assembled the kit, it’s time to fine-tune the calibration of the servos with a script. You’ll have used a zeroing script during assembly to get the rough positions right, so will have already installed the PiDog libraries and software in Raspberry Pi OS.
Detailed online documentation guides you through everything, including running a script to enable I2S sound from the robot’s speaker. It also covers a good range of Python example programs that showcase what PiDog can do.
In patrol mode, for instance, PiDog walks forward and stops to bark when it detects something ahead. The react demo sees it rear up and bark when approached from the front, but roll its head and wag its tail when you pet the touch sensor on its neck. There’s also a balance demo to showcase its 6DOF IMU module that enables PiDog to self-balance when walking on a tilting tabletop.

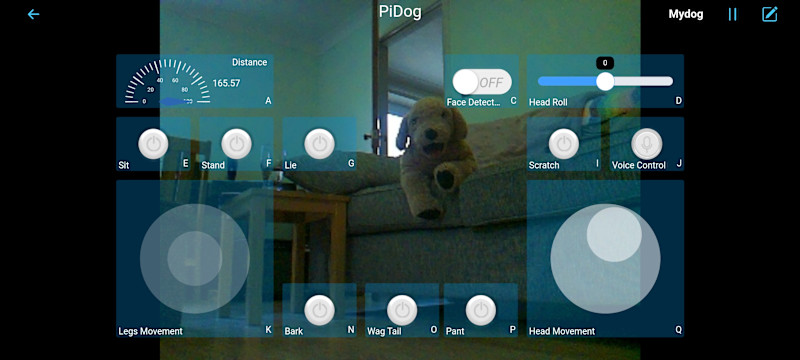
There are a few examples using the camera module with OpenCV computer vision. A face-tracking demo generates a web server, enabling you to see the camera view on a web page. There’s also the option to control PiDog with an iOS or Android app, complete with live camera feed.
You can even communicate with your PiDog via GPT-4o AI, using text or spoken commands – with a USB mic (not supplied) equipped. It takes a bit of setting up, using an API key, but the online guide takes you through the process.
Verdict
9/10
Great fun to play with, this smart canine companion has an impressive feature set and lots of possibilities for further training.
Specs
Features: 12 × metal-gear servos, Robot HAT, camera module, RGB LED strip
Sensors: Sound direction, 6-DOF IMU, dual touch, ultrasonic distance
Works with: Raspberry Pi 4, 3B+, 3B, Zero 2 W
Power: USC-C, rechargeable 2×18650 battery pack


