
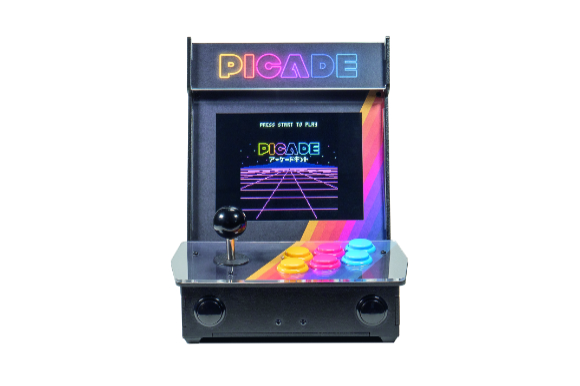
New versions of products are usually billed as ‘bigger and better’, but Pimoroni’s new Picade is smaller than its original mini-bartop arcade cabinet. The display is still 8 inches, however, lacking the thicker black surround of its predecessor. This time it’s an IPS (in-plane switching) panel with wide viewing angles, higher resolution (1024×768 compared to the earlier 800×600), and a new Pimoroni-designed driver board with HDMI input and keypad controls for an on-screen menu.
Another key improvement is the new Picade X HAT, which works with any 40-pin Raspberry Pi. Also available separately (£15) for those who want to build their own custom arcade cabinet, the HAT has easy-to-use DuPont connectors for the numerous joystick and button wires. An additional ‘Hacker’ header breaks out the few remaining unused GPIO pins and I2C, which could be used to add extra buttons. The HAT also features power management and a built-in I2S DAC with 3W amplifier for mono audio – this time there’s only one speaker included, although it’s plenty loud enough.
See also:
- Rediscover Retro Computing in The MagPi #67
- Easy retro gaming on a Raspberry Pi with Lakka and NOOBS
- Pi0CKET Tiny Pi: Raspberry Pi Game Boy-style retro console
- RetroPie: video installation guide
Before you play on your new Picade, you’ll need to assemble it. Taking 2–3 hours, this is an easier process than before, although there are still fiddly bits – mainly involving holding the tiny M3 nuts in hard-to-access places while screwing bolts (tip: use Blu Tack). Full instructions are supplied on the reverse of an A1 poster, but we found the appended online ones, with videos, easier to follow. Assembly is aided by some excellent
packaging, with separate colour-coded boxes for the cabinet, screen, fixings, and accessories.
Picade Quick Specs
- Screen: 8-inch IPS panel, 1024×768 pixels
- Board: Picade X HAT
- Controls: Joystick, 6 × arcade buttons
- Speaker: 3-inch, 5 W, 4 Ω
- Dimensions: 350 × 230 × 210 mm
Picade Arcade assembly
Firstly, a few of the black powder-coated MDF panels need to be screwed together with plastic brackets. Placed upside-down onto a clear acrylic panel, the screen display is connected to its rear-mounted driver board by a short flat flex ribbon cable and care needs to be taken not to pull out the connector tabs too far when inserting it.
Next, add the 30 mm push-fit arcade buttons and a microswitched joystick with ball top. Since these are standard parts, you could potentially customise your Picade by using different (possibly illuminated) buttons and joystick topper.
The wiring is easier than on the original Picade due to the DuPont connectors on the HAT, so you simply push in the pins of the wires, although the other ends still have spade connectors (and there are push-fit connectors for the speaker wires). As long as you get each wire loom the right way round at the HAT end, you should be able to make the correct connections for the joystick and buttons. In addition to the six control buttons, there are four utility buttons placed around the cabinet and a light-up yellow power button – simply press this to turn the Picade on and off, automatically shutting down the Raspberry Pi safely – a really nice touch.

Setting up the Picade
Before turning on, you’ll need to download RetroPie and write it to a microSD card – and uncomment a line in the boot/config.txt file to force HDMI output, to make the display work. The card can then be inserted into the Pi mounted inside the cabinet via a handy access hole. Alternatively, the back panel can easily be removed for easy access to all the components.
A standard 5 V micro USB power supply (not included) powers the Picade X HAT, which in turn powers the Pi, and the display via a USB cable. Hit the power button and away you go. Well, not quite. You’ll first need to connect a keyboard to the Pi and install the Picade X HAT driver with a one-line Terminal command.
Then it’s just a matter of setting up the joystick directions and buttons in the EmulationStation menu and – after adding ROM files to RetroPie – playing your favourite games. Hadouken!
Picade verdict
A fun, if at times fiddly build, this all-new Picade features high-quality components and feels sturdy. Major improvements over the original version include a vivid, higher-res IPS display and easier-to-connect Picade X HAT.
9/10


