
When Martin Mander saw The MagPi was giving away a free hardware voice kit from Google in issue 57, he did the sensible thing and rushed off to buy a copy. But after he assembled the components, placed them in the cardboard housing, and pressed the button to activate the Google Assistant to ask a question, he started to think about the future possibilities.
Ironic, then, that he promptly delved into the past. “The family and I enjoy the local car-boot sales and I’m always looking for old, obsolete or broken technology that I can use in projects,” he says, relishing the chance of picking up something from the 1970s and 1980s.
The full article can be found in The MagPi 61 and was written by David Crookes.
He noticed some intercoms which were in their battered original packaging, and he thought it’d be fun for the kids to be able to chat between their rooms. “They didn’t work, and so I shelved them in the workshop,” Martin continues. “Then the Voice HAT came along and I decided it would be nice to preserve the spirit of these intercoms in a small way.”
Martin’s idea was to fit the Google AIY kit into one of these old units. “I’d followed the instructions in The MagPi to assemble the HAT and get the software up and running on the Pi,” he recalls. With the Pi and HAT running on his desk, he tested some voice commands before getting on with the task of cracking open the old intercom. “There’s always a slight feeling of naughtiness in ignoring the ‘do not open’ warning and seeing what’s inside,” he says. “The great thing about older tech is things tend to be screwed or bolted together, allowing them to come apart nicely, leaving just the case.”
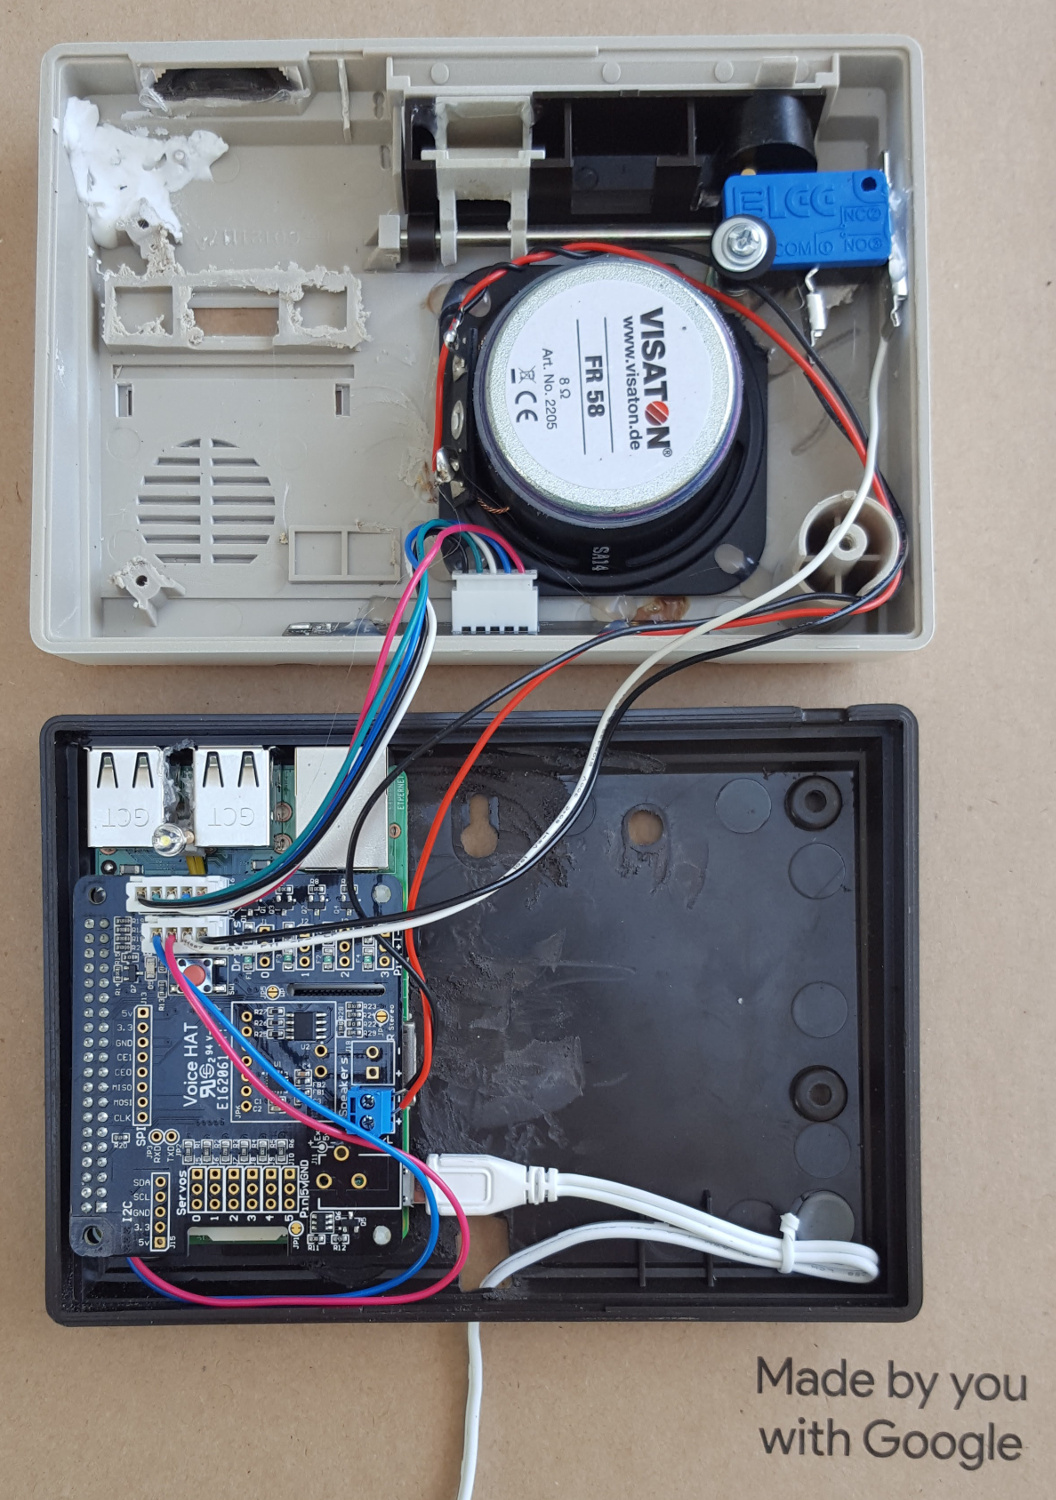
Having made lots of tiny measurements, he was convinced the kit would fit, so he cleaned and spray-painted the front of the case, let it dry, and began bolting the Pi into the case, adding the other components around it. “I set aside the green push-button from the kit, but kept the microswitch and fixed it inside the case alongside the big hinged intercom button.”
Getting the microswitch in exactly the right place was the greatest challenge and it involved lots of trial and error: “Because it was being activated at an angle by the rear of the button, even a couple of millimetres made the difference between the microswitch sticking ‘on’ or there being too much play in the action.”
Martin then removed the LED from its case and soldered in a two-hole component connector to secure it between the Pi’s USB ports, under the original microphone grille. “The kit’s microphone board was just glued into place once I’d drilled holes in the top of the case. Once that was in place, I connected the cables and closed the case.”
Martin is pleased with the result: “The kids have described it as fancy and futuristic, which I’ll happily take.” He has since linked the intercom to his IFTTT account (see ‘A connected home’ box). “This took some configuring,” he concludes, “but thinking up responses for the intercom to read out when the triggers are activated was really good fun.”


