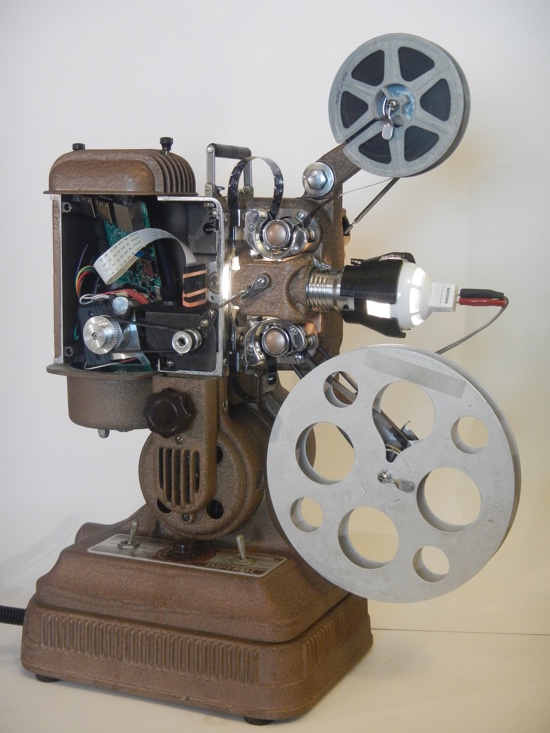
Pi Film Capture is an excellent project used to transfer home movie reels to digital video.
Restoring home movies captured on film can be a real challenge. Film conversion is a time-consuming and often expensive task.
One maker, Joe Herman, took matters into his own hands by hooking up a Raspberry Pi Camera Module to an old projector.
Joe’s cousin and uncle uncovered a box of 130 reels recorded by his grandfather. Leo’s moves “dated back to 1938,” says Joe.
The preservation of these memories was important for Joe’s large extended family. But to have them professionally restored would have cost “many thousands of dollars.”
Build a Film Transfer device using a Raspberry Pi and an old cine projector

The obvious approach with a project like this would be to run the movie and record it using a camcorder. The results from that approach are very poor, though.
Professionals photograph one still image at a time and then stitch it all together, which is why the process is so expensive.
Pi Film Capture is a smart film transfer system that uses a Raspberry Pi and Pi Camera Module with Bell & Howell 8mm and Super 8 projectors, or an Ampro Imperial 16mm.
The setup employs a frame-by-frame approach. The Raspberry Pi takes a still photo of a film frame and sends it to a remote client computer for processing.
The Raspberry Pi is connected to a stepper motor that moves the frame to the next cell. It then repeats the process until the entire reel is captured. “Most old projectors would work,” reckons Joe. “They were built to last.”
The software used for digital film conversion
Once the process is completed, the result is a folder of images. “I can combine these quickly into a viewable movie using FFmpeg,” says Joe. If a more sophisticated clean-up is required, he uses a program called AviSynth.
“A key design goal for me was to use easily obtainable parts,” reveals Joe. “Mostly because when I began the project, I was unsure whether it would go anywhere and didn’t want to invest too much in expensive equipment.”
Joe solved “endless” challenges while designing Pi Film Capture. “Most were due to my inexperience and ineptitude,” he tells us. “Or bad programming techniques.”
The first proof-of-concept device drove the projector and triggered a capture as each frame advanced. “It fooled me into thinking this would be an easy project,” recalls Joe. But frames were often under- or over-exposed. Sometimes it would miss frames altogether.
As Joe iterated through different versions of the project, he added a separate client computer: a PC running Ubuntu Linux.
The client computer runs a control panel that lets the user adjust the camera, and displays the captured frames as they come off the Raspberry Pi. It also sends some simple projector control commands to the Pi.
The latest version of the Pi Film Projector uses OpenCV. This software adds computer vision and multi-core processing to the project.
“OpenCV provides functions similar to the HDR mode on cell phone cameras,” explains Joe. Given several photos at different exposures, it can blend them into a single image that preserves detail in both bright and dark areas.
“For some films, this can make an enormous difference,” says Joe. “The downside is it slows down my captures by nearly half as I take more photos, so I try only to use it when necessary.”
Joe advises prospective makers to have patience with the build. “It has a lot of pieces,” he says. The captures take a lot of time, and getting good results can take a lot of practice.
The results are worth it. Joe has converted over 100 of his grandfather’s reels. “Bringing some family history to life again and sharing it has made this the most rewarding tech project I’ve ever worked on,” he tells us. “I hope it inspires other people to bring that old box of film cans out of the closet and reconnect with their history.”


