We’ve selected six Camera Module-related projects to try out. If you need some inspiration, then take a look at the pick of the bunch. Here is our guide to the best Camera Module projects for Raspberry Pi.
Pi Zero LED case hack
As you now know, the NoIR version of the Camera Module has the infrared filter removed from the lens so that it can detect infrared light. This makes it an ideal choice for projects in the dark. In this neat project, you can easily add IR LEDs to provide additional infrared light, so that your pictures capture more detail in the dark – and all housed within the official Raspberry Pi Zero case, too!

Stop-motion animation
Stop-motion animation – think Wallace & Gromit – is where a series of photographs are taken, but with minor changes made to the ‘scene’ being filmed. The scene is changed slightly between shots – known as frames – and when they are all stitched back together afterwards, the illusion of animation is complete! In this fantastic tutorial, learn how to add a button to your Camera Module setup and create your very own stop-motion animation!

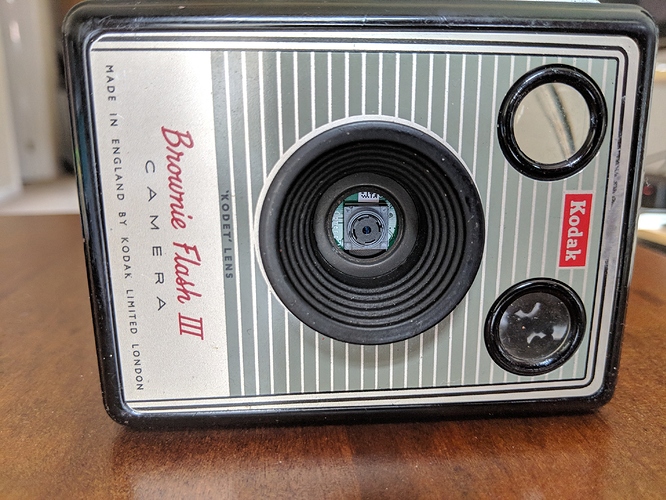
Rodak: a Pi in a Kodak
Taking photos is what the Camera Module is designed for, so what better way to do that than to upcycle an old Kodak Brownie Flash III camera to house a Raspberry Pi Zero, like Alex Ellis did? It also contains some additional components, such as a LiPo battery for power-on-the-go, a push-button to trigger the camera, and a cool NeoPixel status LED to show you when the camera is ready to fire again!

Google Vision: Camera Tell
This cool project, by Dan Aldred (aka TeCoEd), makes use of the Google Vision cloud service. If you haven’t heard of Google Vision, it uses artificial intelligence to analyse an image and tells you what is in it! Dan takes this project even further by creating a portable camera – housed inside an old disposable camera – that uses a Camera Module, as well as Google Vision to announce what you have just taken a photo of.

Home CCTV with motionEyeOS
If you missed our Home Security feature in issue 73, then you should definitely check out the handy motionEyeOS, which is a standalone operating system that runs on Raspberry Pi and allows you to easily create your very own home CCTV setup with a few clicks. Once the OS image is flashed to your microSD card, you will be up and running in no time and be able to keep an eye on your home when you are away.

Make a parent detector
Do you suspect your parents sneak into your room when you’re out? Do they play on your Xbox or PS4 without your permission? Then follow this tutorial and build a parent detector, using the Camera Module and a PIR (passive infrared) sensor, and catch them red-handed! Learn how the PIR sensor can trigger the Camera Module to take a photo whenever it detects movement, then see how your parents react when confronted with the evidence.


