01 Raspberry Pi hardware
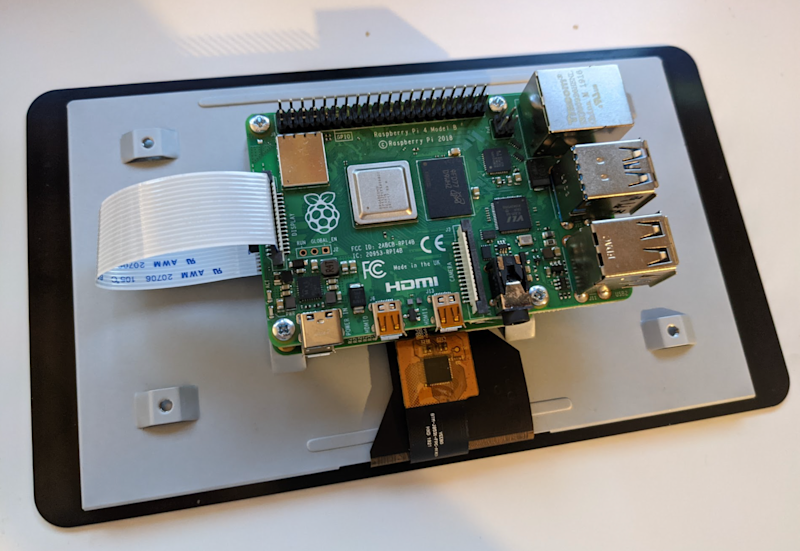
You’ll need a Raspberry Pi 4 for this project so that you can make the most out of your custom tablet, although you can use a Raspberry Pi 3B+, Raspberry Pi 400, and Compute Module 3 with emteria. Emteria also supports HDMI on Raspberry Pi so you can connect it to a monitor, TV, or other kind of small display depending on if you want to use it as a tablet for development.
With an official touchscreen, you can cut down on some wires and have it work in a traditional Android way.
02 Build your tablet – part 1
To make sure everything is working before fully committing to our build, we suggest just connecting Raspberry Pi 4 to the display at first. You may need to construct your screen, however that is quite simple and there are full instructions here.
You do not need to add the jumper wires between the control board and Raspberry Pi though, as you will need to power Raspberry Pi and the display separately. You can use the special USB splitter cable that came with the SmartiPi Touch 2 case if you wish to make it easier down the road, however you will at least need a micro USB power supply and a USB C power supply.

03 emteria.OS Installer
You’ll need to create an account for emteria.OS, which you can do at Emteria's website. Once you’ve done that, you can head to the download page and download the installer. Run the program once it’s downloaded to install – you may need to tell Windows to ‘run the software anyway’ if a warning window pops up.
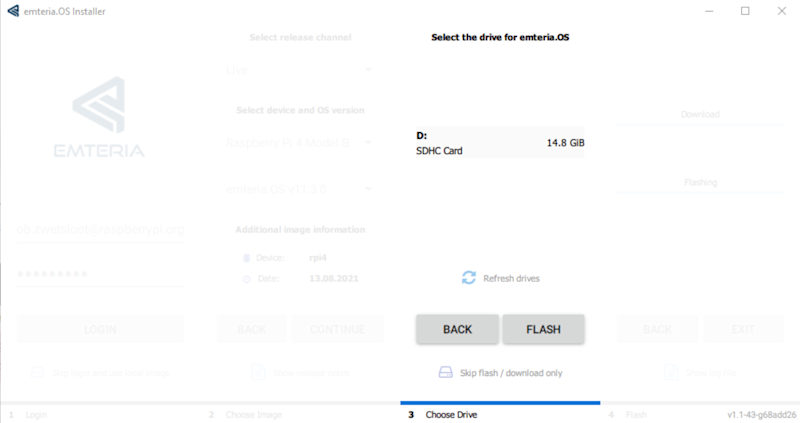
Once this is done, open the Emteria installer app, and you will be asked to login using the account details you created earlier. From there, select your hardware (Raspberry Pi 4), choose the right SD card if you have multiple plugged in, and then click flash for the installer to do its job.
04 Initial emteria.OS boot
Once the install has finished, plug your SD card into your Raspberry Pi connected to the touchscreen. Put the power in for the screen (the micro USB on the controller board), and then plug the power into Raspberry Pi 4.
It will cycle through the boot a few times before finally showing the emteria logo pulsing – after a while this will transition to a grey screen and do some set up before allowing you to click on next, where you’ll perform the classic Android setup.

05 Initial emteria.OS setup
The touchscreen will be working at this point, however you can always connect a mouse and keyboard if you want to run through the process a little quicker. After setting your time zone time, and date, you then need to select your WiFi network to connect to. Once again, if you’ve used Android this should be familiar.
Now you need to activate your install (although you can test it out for eight hours at a time before a reboot). We logged in via our account, but you can enter a key if that’s easier for you. Skip the next two steps, agree to the EULA, and hit reboot for everything to be applied.
06 Build the tablet – part 2
If installation and setup went fine, you can install your Raspberry Pi and screen into the SmartiPi case. Once again there is a handy build guide on how to do this.
At this point you can add a Raspberry Pi Camera Module to the whole case build, however at the time of writing it is not supported in the OS. The emteria team are working on it though, and some USB webcams are supported right now, so if you’re desperate to take photos there are ways.

07 Install extra software
As emteria is not an official version of Android, you’ll not have access to the standard Play Store. You can still sideload APK files if you download files to the device though, and there is F-Droid which is a free and open-source app store for Android. Opening up this app will prompt you to do an update before installing any apps, just like you would on the Play Store. You will have to allow it to install third-party apps from the system settings, which it will help you do.
08 Advanced settings
You’ve probably noticed that the tablet is currently set to landscape. With no gyro inside, you cannot automatically change the orientation. Bringing up the emteria settings allows you change the orientation to portrait (90 degrees), or even flip the entire screen over (180 degrees). You’ll also notice there are a load of the developer settings sitting in here, such as keeping the screen awake (useful if you have it plugged into a power supply for this stage), along with other settings for remote work, Ethernet connections, launching apps at boot, etc.
09 Other Android differences
While many parts of emteria work like stock Android, there are a few differences that are worth noting. First of all, as there is no dedicated off button on a Raspberry Pi, you’ll find there is a shutdown app in the library that allows you to turn off, reboot, and head to recovery. The browser is not Chrome, and other default apps are swapped with non-Google based ones. You can still login to Google services using the browser though, and there are other browsers you can try as well.

10 Kiosk mode
One of the great features of emteria is its ability to act as a kiosk – a terminal with limited functions that you set yourself. It’s meant for more public places that might require people to sign up to a service, or get directions in a large area.
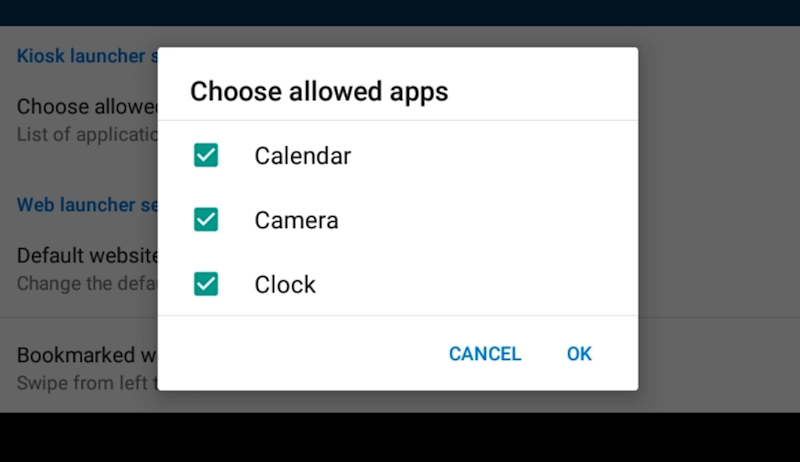
To turn it on, go to the emteria settings and toggle Kiosk state. Set a password so you can turn it back off, and then select Kiosk or Web launcher. In Kiosk launcher you can choose ‘approved apps’, which will be the only apps the users can use. Similarly, web launcher sets a selection of bookmarked websites that are the only ones that can be visited. Tapping ten times on the screen will bring back the Kiosk settings menu.
11 Portability
As well as a portable battery, taking a power supply with you can also work in case you stop in a place with power. SmartiPi Touch 2 also has a stand, making it easier to use on the go as well, however it does mean it’s not quite as slim when folded up – the stand part can actually be removed with a screw to cut down on this size, making the whole thing a little easier to take with you.
12 Development tips
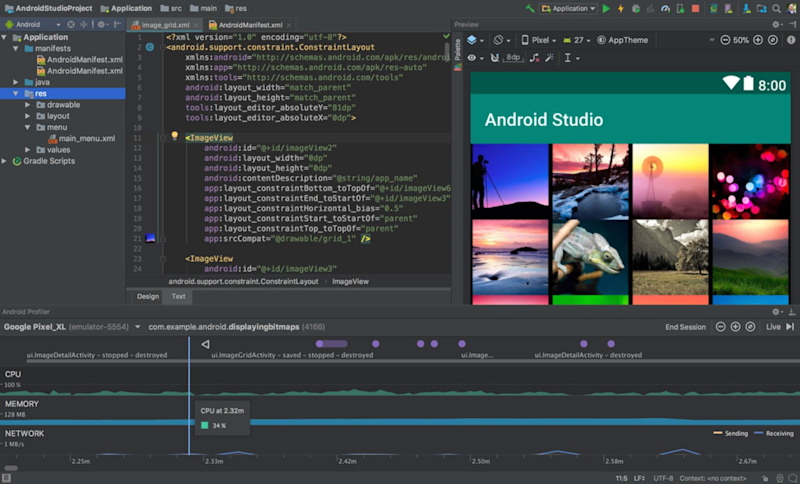
Emteria is based on the latest version of Android – Android 11 – making it a great development environment for Android apps. Even just connecting it to a monitor, or using the VNC functions, will allow you to test out apps you’re creating.
Heading to developer.android.com will give you some great beginner tutorials and sample code on how to start, as well as the tools needed to build apps.


